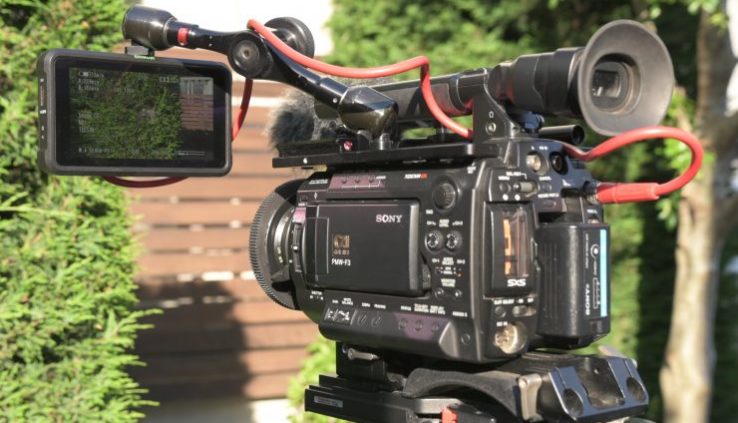
Atomos Shinobi SDI Review
By Adam Noyes
The Atomos Shinobi SDI model was announced back in February. It is essentially exactly the same as the HDMI only version of the Shinobi, with you guessed it, the addition of SDI.
For years customers have been hounding Atomos to make a monitor without a recorder. Well, they came to the rescue with the Shinobi, a 5″ HDMI monitor that costs $399 USD. That was great for Vloggers and users of mirrorless, DSLR and other cameras that only have HDMI outputs, but what about for the rest of us?
For those wanting a small, portable SDI capable monitor Atomos came up with the Shinobi SDI.
I personally think Atomos should have released both the SDI and HDMI versions at the same time or at least told potential customers an SDI version was coming. There is bound to be a lot of upset customers who already bought an HDMI Shinobi who would have been happy to pay $100 more for a version with both SDI and HDMI.
The Atomos Shinobi SDI is very light and it weighs in at 7.97 oz / 226 g. It has an all Polycarbonate ABS body instead of using a combination of aluminum and polycarbonate like the Ninja V. By making the Shinobi SDI out of polycarbonate, Atomos has been able to make the monitor 37% lighter than the Ninja V.
This lack of weight certainly makes the Shinobi SDI a good companion for lightweight digital cinema cameras like the Canon C200, C300, Sony FS7, FS5, and Panasonic EVA1 etc.
Look I’m not going to lie, I’ve had a problem with the build quality of some Atomos devices in the past, and I have certainly been vocal about this. I’ve always felt that the build quality of a lot of their products has been more centred around catering to the prosumer market than the pro market. Atomos devices have never felt as robust to me as other options on the market. In saying all of this, I think Atomos turned the corner with the Ninja V.
As far as build quality is concerned, I would have personally preferred to have seen the Shinobi SDI be built out of a combination of aluminum and polycarbonate like the Ninja V.
The Shinobi SDI isn’t as solidly made as the Ninja V and it doesn’t feel any better built than the previous Atomos products such as the Ninja Inferno and Shogun Inferno that are also made out of polycarbonate.
There are some small niggling things I did notice when it came to build quality. I did find that the battery plate is not nearly as good as the one found on the Ninja V. Not only are the batteries harder to put in, but they also wobble around. This battery wobble occurred with an Atomos battery that was supplied with the Shinobi. I also tried some genuine Sony L series batteries, and while they were slightly better, they still wobbled around.
Whether the build quality of the Shinobi SDI is up to your standards really depends on what you are going to use the monitor for. If you are just going to use it indoors then the build quality isn’t probably going to bother you. If, however, you are going to use it outdoors in run and gun environments then you may be better served to go with a Ninja V, SmallHD 502, 702, or Focus 5. In my opinion, these are better options due to having a more robust build with aluminum housing. That’s not to say the Shinobi SDI won’t survive, but if your primary concern with a monitor is build quality then there are better options out there.
If you are interested you can see my full review of the Ninja V or our initial posts on the release of the Atomos Shinobi and SDI model.
Who is it aimed at?
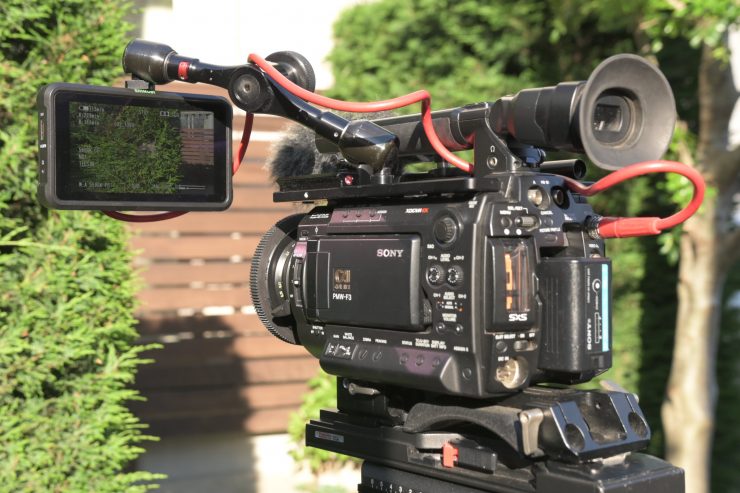
Atomos wanted to make the Shinobi SDI easy to use with smaller digital cinema cameras, but versatile enough so you could also use it with a DSLR or mirrorless cameras.
If you are a solo shooter then every ounce of weight you can save is beneficial. Having a good quality external monitor certainly helps when you are shooting with digital cinema cameras that have bad LCD screens. , and let’s face it, that’s most of them.
If you don’t want to go down the route of using a EVF then something like the lightweight Shinobi SDI makes a lot of sense.
Tools
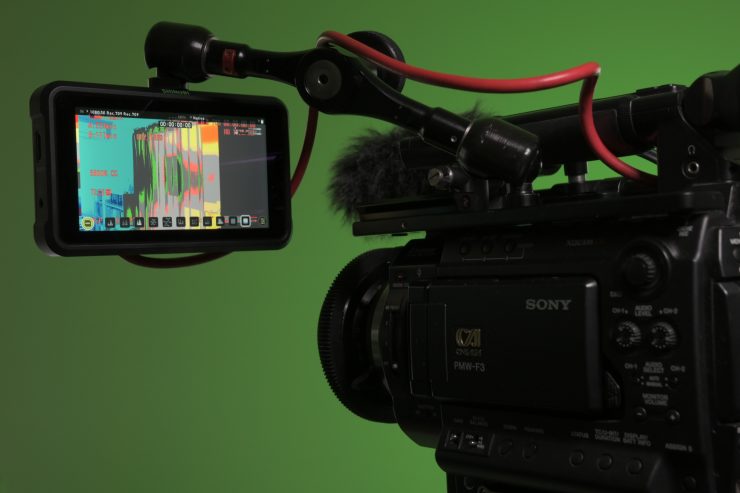
Just like the Ninja V the Shinobi SDI is loaded with exposure and monitoring tools.
SHINOBI TOOLS FROM LEFT TO RIGHT ON MONITOR
- Waveform
- RGB Parade in Black and white
- Waveform with RGB
- Vectorscope
- Vectorscope Zoomed
- Histogram
- Histogram With RGB
- Analysis
- Peaking
- Zebra
- False Color
- Zoom 1:1
- Zoom X2
- Zoom X4
- Frame Crop – 16:9, 2:41, 2:35, 1:9, 1:85, 4:3
- Title Safe Guides
- Anamorphic de-squeeze 2x, 1.5x, 1.33x
Mounting Points
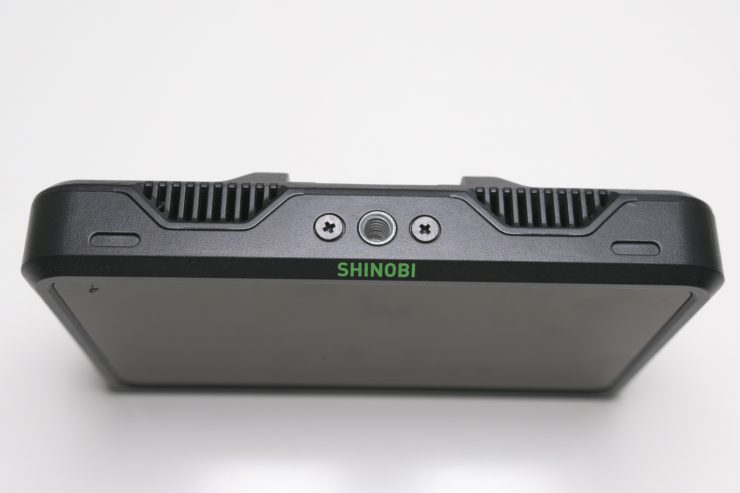
The Shinobi SDI has two 1/4-20″ mounting points. One on top and on the bottom.
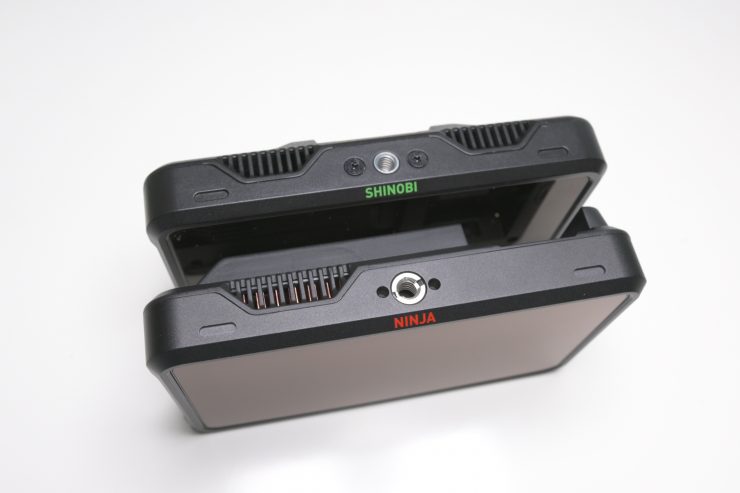
Unfortunately, the ARRI accessory mount isn’t included like it is on the Ninja V. I really like the ARRI accessory mount as it has two pins on each side of the 3/8″ screw that prevents twisting when mounted. This is such a great design as monitors tend to twist when mounted to a single 1/4 20″. Why Atomos didn’t use the same mount for the Shinobi SDI as they did for the Ninja V is anyone’s guess.
I found that when I was using the Shinobi SDI the monitor kept twisting around. This is not necessarily the fault of the monitor, but a common problem when using a lot of monitor arms.
Screen & Monitoring
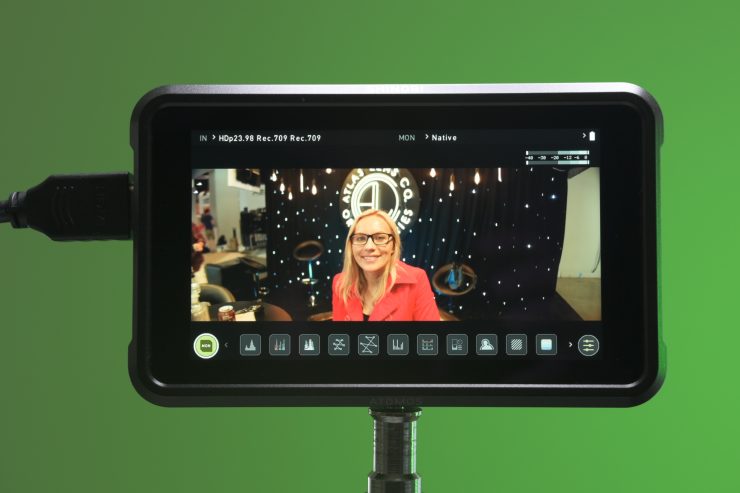
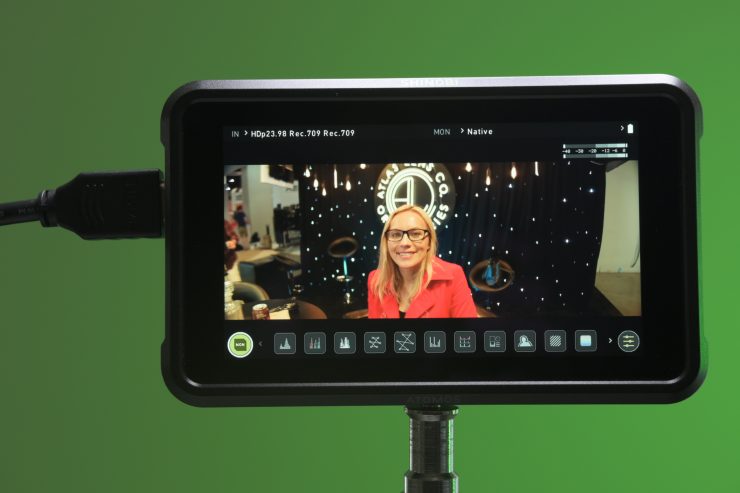
The Shinobi uses the same screen as the Ninja V, so you get an identical 5.2” 1000nit anti-reflection uni-touch IPS panel. If you like the Ninja V screen you will like the Shinobi’s too. The resolution is full HD 1920 x 1080 with a very high 427ppi. It is capable of receiving a 4K signal and displaying it in full HD through the HDMI input. As the SDI version is only 3G it can’t handle a 4K signal so you are limited to outputting HD from your camera. The image looks really good with nice detail making it very useful for anybody who wants to obtain critical focus.
In short, the screen on the Shinobi SDI is pretty impressive. The images are very sharp and detailed and it makes getting critical focus a lot easier.
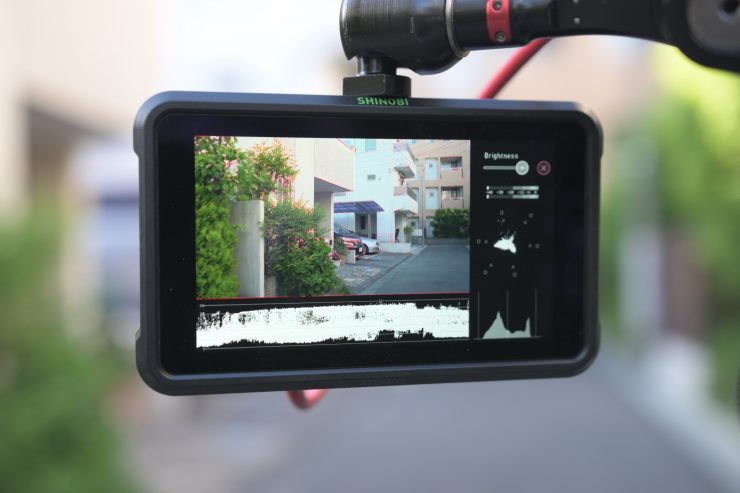
While Atomos states in the specifications that the monitor is 10-bit, the screen display on the Shinobi SDI is not a “true” 10-bit display. It is actually 8+2 FRC.
8+2 FRC (Temporal Dithering) is a way of turning the 16.7 million colors from an 8-bit panel into the 1.07 billion colors that a true native 10-bit panel can display. 8+2 FRC uses various algorithms that flash 2 color tones very rapidly, thus giving the perceived impression of a third color that really isn’t there. This may sound like some sort of sneaky parlour trick, but almost all of the major panel manufacturers are now doing this. Atomos, SmallHD, Flanders, and even your 5K iMac display are all 8+2 FRC displays. 8+2 FRC panels are considerably cheaper to manufacturer than a true native 10-bit display.
The good news here is in reality, 8+2 FRC panels are almost impossible to distinguish from true 10-bit native panels. The only small difference is when it comes to viewing material that was shot in low light conditions at higher ISO values. On an 8+2 FRC display, the image will appear to show more noise than what an actual native 10-bit display will.
Colors look fairly accurate out of the box, and I did find the images looked a lot closer to what they should than say a SmallHD 502 which I have owned for quite a long time. In saying that, the SmallHD 502 is hardly new and has been around for many years. I would certainly expect that a monitor made in 2019 is going to outperform one that is four years old.
Is the Shinobi SDI daylight viewable?
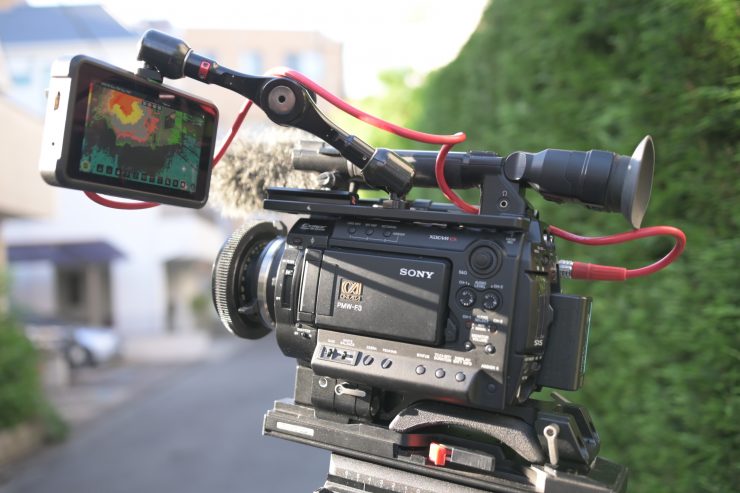
When I was using the Shinobi SDI indoors I found that I could have the backlight set at 100% and it wasn’t too bright. For outdoors use the Shinobi SDI is very viewable in a lot of conditions.
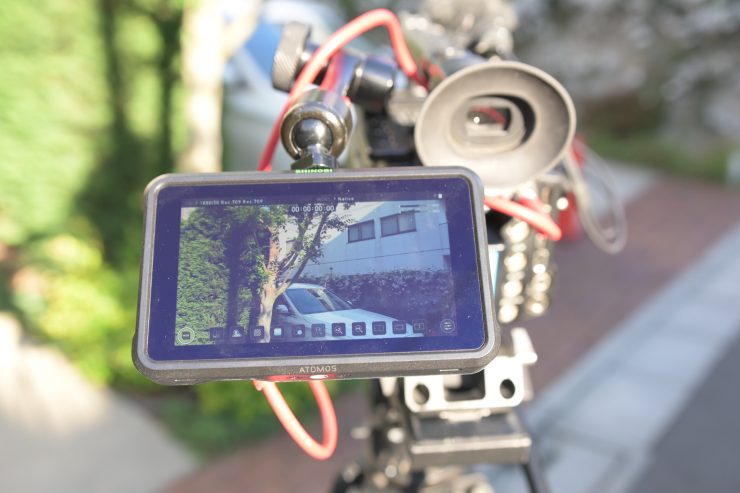
I was surprised at just how well it performed, even in bright conditions, although if you have full sun hitting directly on the back of the screen it will be hard to see.
Even though I could still see the screen in fairly bright sunlight, I personally don’t think that 1,000 nits are enough for a monitor to be considered daylight viewable. If you are trying to judge critical focus and exposure only off a monitor you need to be able to see the screen clearly in any kind of conditions.
I wanted to see how the Shinobi SDI compared to the Shogun Inferno for outdoor viewing. The Shogun Inferno is 50% brighter, having 1,500 nits as opposed to 1,000 nits on the Ninja V & Shinobi. I was surprised with just how well the Shinobi SDI held up. While the Shogun Inferno was brighter, its screen seemed to be more reflective than that of the Shinobi SDI.
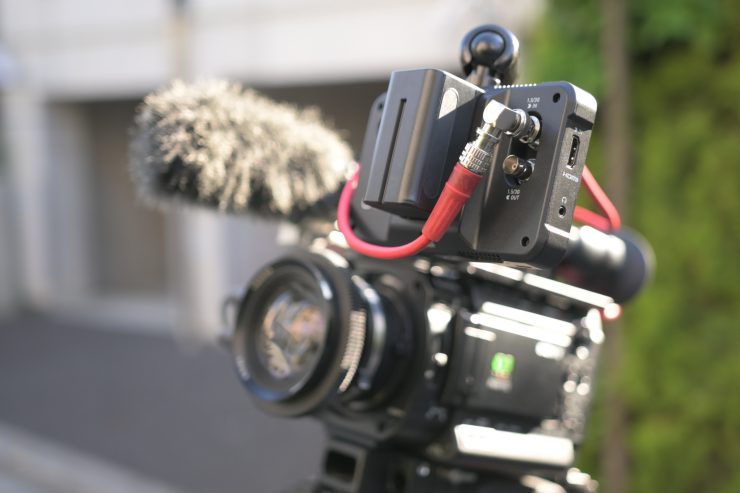
There is a massive difference with using a device like the Atomos Shinobi SDI for monitoring instead of your cameras built-in LCD screen. The majority of LCD screens on cameras are not very bright and almost impossible to view in sunny conditions outdoors. The Shinobi SDI, while not a perfect solution, can be used as a better alternative to these screens.
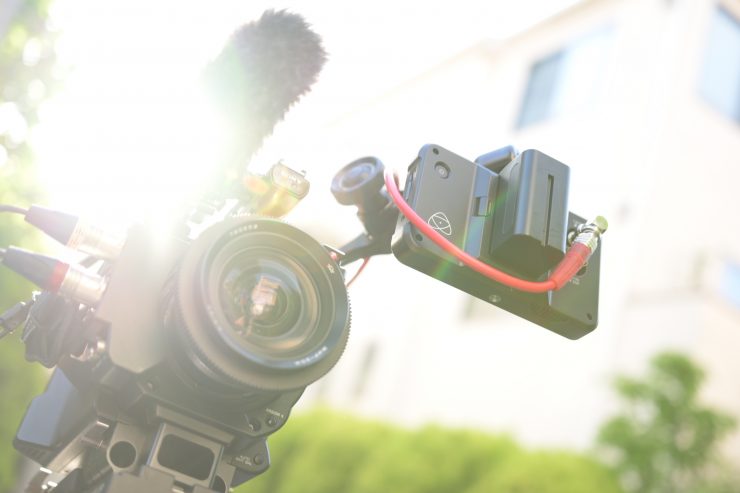
If you are someone who prefers to shoot with a monitor rather than an EVF (I’m not one of them!) then the Shinobi SDI is light enough that you can put it out on a monitor arm and even use it while shooting handheld.
Is it actually 1,000 nits?
To check the claimed brightness of the Shinobi SDI I shot a white card with a light set at 5600K, and then exposed the image so it was just below 100% so there was no clipping. I then took a reading from the Shinobi SDI using a Sekonic C-800. The Shinobi SDI has a claimed maximum brightness of 1,000 nits so does it produce 1,000 nits?
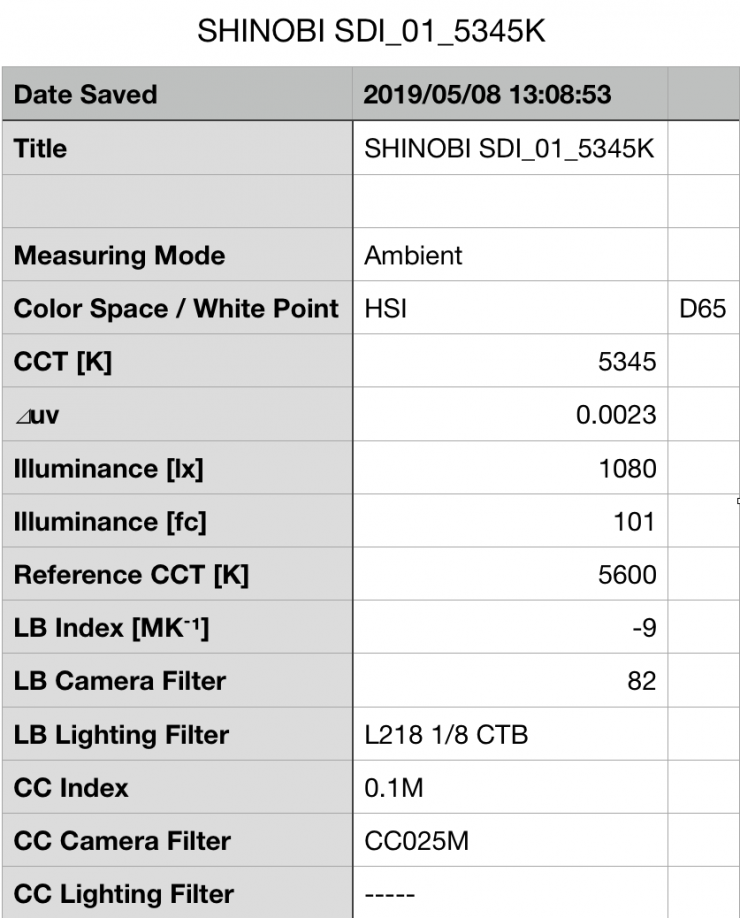
The Shinobi SDI gave me a reading of 1,080 lux and a Kelvin color temperature reading of 5345K. Just for reference, it had a CC score of 0.1M. The reading of 1,080 lux exceeds the Atomos figure of 1,000 lux.
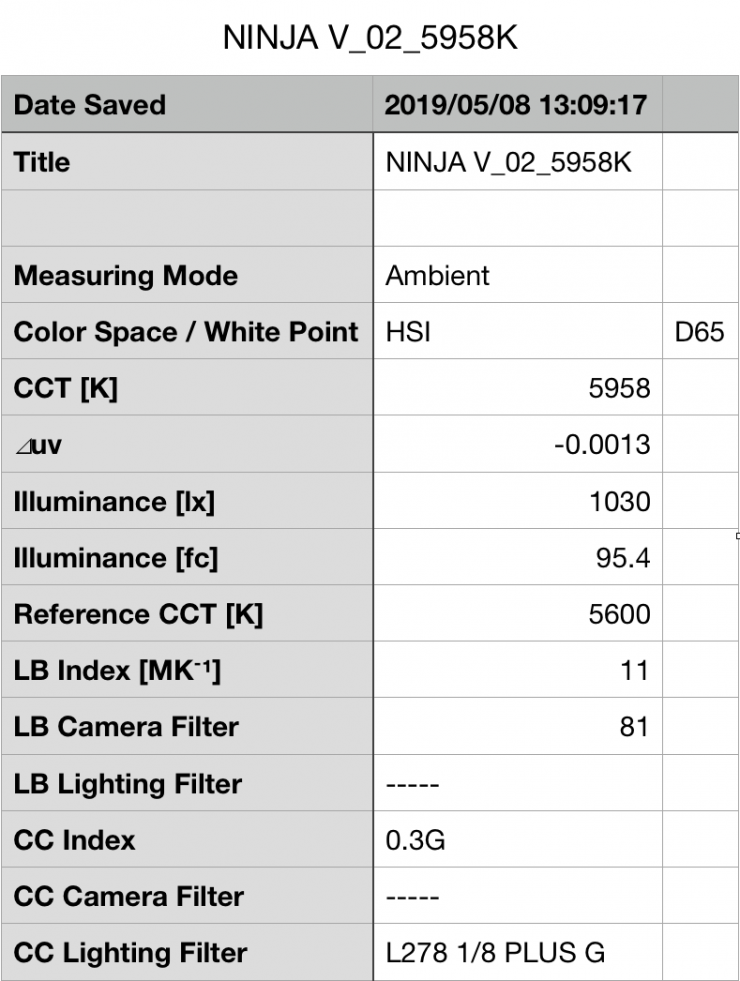
Just out of interest I thought I would do the exact same test with the Ninja V as they are supposed to use the same screen. The Ninja V gave me a reading of exactly 1,030 lux and a Kelvin color temperature reading of 5958K. Just for reference, it had a CC score of 0.3G.
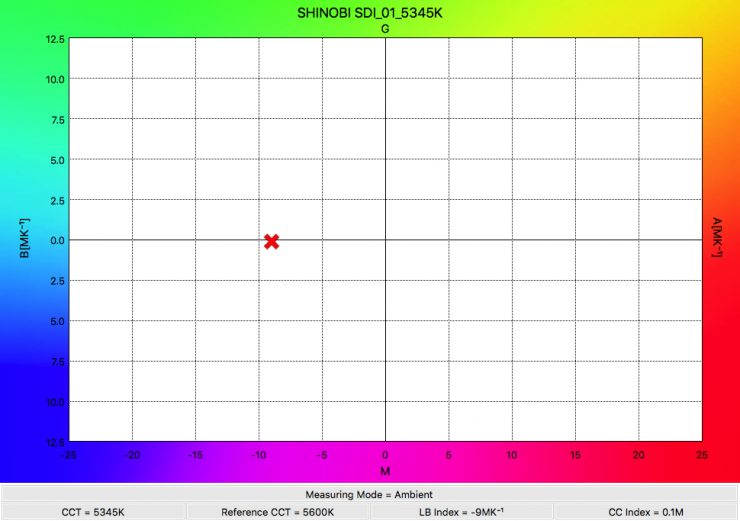
Even though both monitors gave me almost identical lux readings, the Kelvin color temperature and CC Index were completely different. The Ninja V screen was over 600K higher than the Shinobi SDI, and it lent towards magenta, while the Shinobi SDI had a slight push towards green.
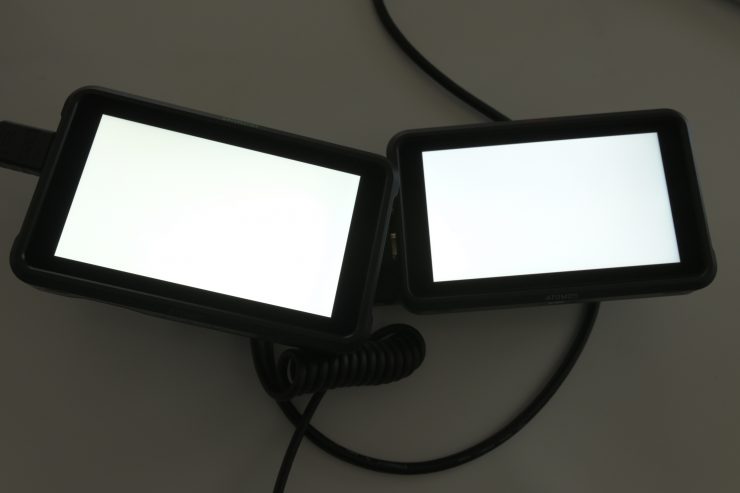
Both of these monitors can be calibrated with X-Rite products, and given my testing, I think it’s a good idea that you probably do calibrate the screen.
Fingerprints
The only negative aspect about the screen, and this goes to any touchscreen display, is that you end up getting a lot of fingerprint marks.
AtomOS
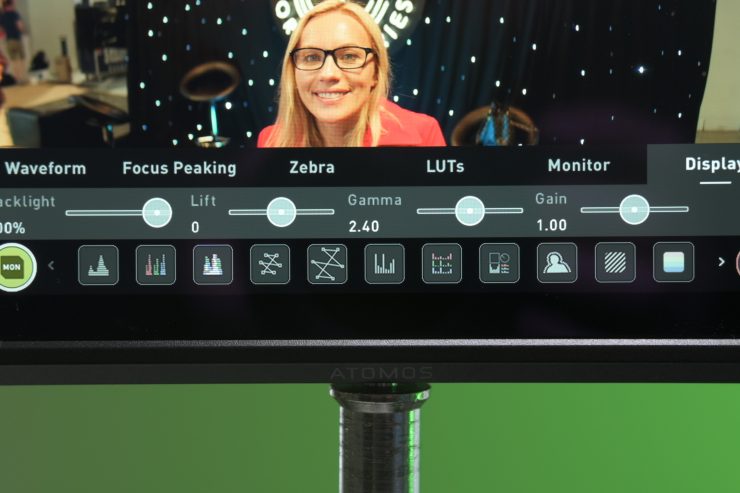
The AtomOS on the Shinobi SDI is easy to use and although Atomos says that it doesn’t take up a lot of real estate on the screen, it still does. Putting up information on any small sized screen is always tricky because you have limited real estate to work with. Just how to lay out that information clearly and concisely is a bit of a juggling act. Maybe a layout where all the information is on the outside of the actual image would have made more sense, but on a small 5.2″ display that would be difficult.
In my opinion, the latest OS is slightly easier to navigate and make changes than with previous AtomOS iterations. I never quite got comfortable with the AtomOS on devices such as the Shogun Inferno. I always found it clunky to use and operate and you always had to go searching for tools that should be easy to access. I’m still a stickler for physical buttons for key monitor features. I like being able to press a dedicated button that I know will do the one thing I want, quickly and efficiently. While there is nothing wrong with touchscreen technology, I usually prefer physical buttons so I can use them in any conditions, even when I am wearing gloves. I did also find that on occasion I would be touching the screen and nothing would be happening. Sometimes I had to touch the screen multiple times or try using different fingers for it to work.
The old AtomOS system was starting to feel a little bit long in the tooth and I’m glad Atomos decided to make the change. The new AtomOS uses minimal menu trees to navigate to the monitoring tools. Having the ability to simply scroll through all the options on the bottom of the screen is a lot more convenient than the way you used to make changes. In saying that, the menu system isn’t a dramatic departure away from what they were doing, it’s just a more convenient implementation.
The bootup time is also impressive on the Shinobi SDI. From the time you press the power button to the time the screen comes up is less than 3 seconds.
One thing I noticed is the touchscreen is a little problematic. Swiping and tapping are inconsistent. To clear the menus a simple double tap on the screen does the job however, it doesn’t always respond and I have to tap again. I’m not sure why it’s doing this but feel it’s a bug or I just don’t have the tap speed right. With the menu bar to access more tools, you swipe to the left on top of the menu bar. This has to be performed quickly and not stop at the end of the swipe. If you do stop the Shinobi opens the tool. This can be a little annoying but I’m sure it can be fixed with a firmware update.
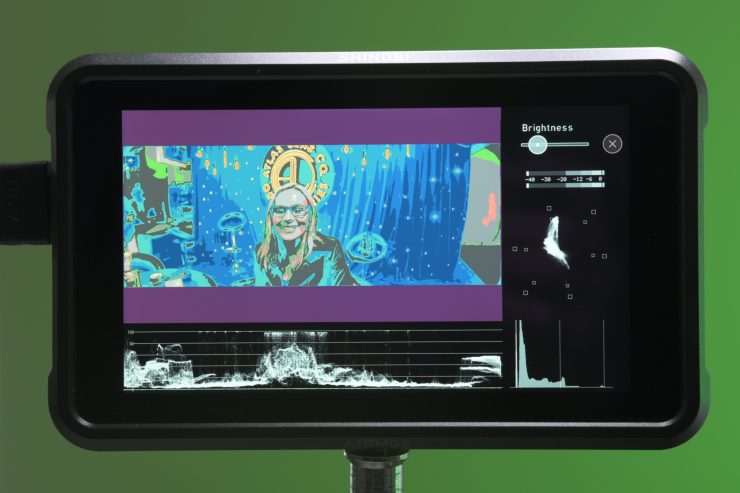
A new tool not available on the Ninja V & Shinobi is the new “Analysis” feature, you can now simultaneously see what you are shooting, view a waveform, histogram, and vectorscope, without the scopes covering the image. As for customizing them you cant change the tool or location but you can change how the tool looks.
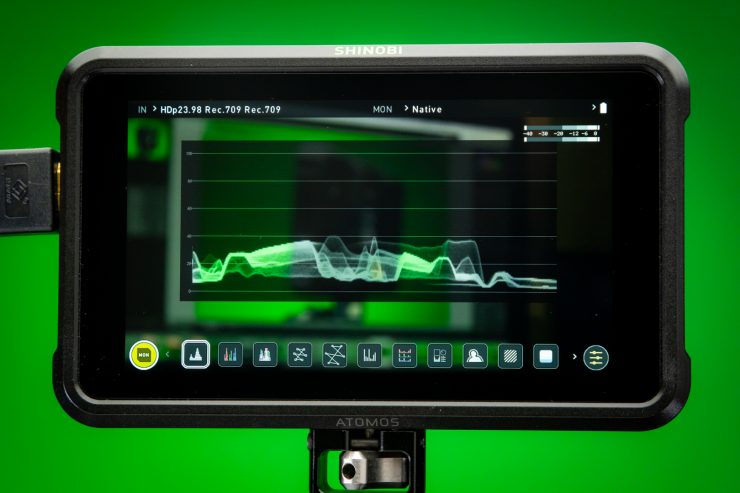
The Waveform with a single tap on the tool icon opens in the corner. Tap on the Waveform and it will get longer. Tap on it again and it goes full. You have options with the Waveform as well. RGB or black and white and RGB Parade. These are very good tools that pros like to use. For photographers. The Shinobi SDI has a Histogram that also has a color option with RGB.
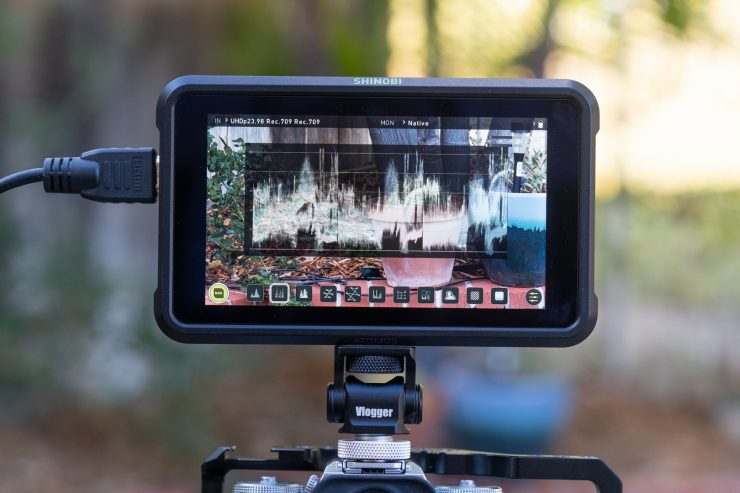
I really appreciate the Brightness Level adjustment for the scopes. I like it really low so the lines are thinner and to me, more precise. It’s a little tricky to set with the slider just right being so sensitive. I also would have liked the RGB Parade to be in color. It’s something I’m used to and find it more comfortable to view.
There is also a nice new feature which Atomos likes to call the “shooting page“. By deselecting the monitor icon on the screen you can remove all the monitoring icon tools and just be left with your timecode, audio meters, and waveform.
Atomos False Color
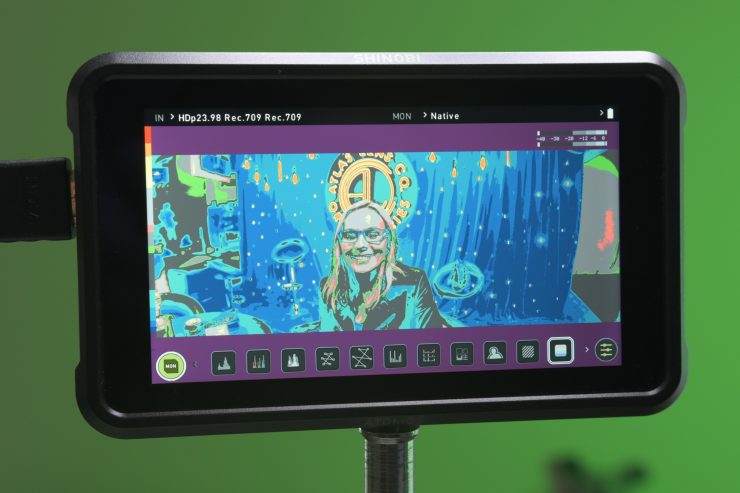
I still can’t quite understand why the false color guide isn’t labeled in any way. I know the values change depending on what camera is being used, but I’d still like to see some rough numbers that correlate to the colors. For new shooters, the way false color is displayed on the Shinobi SDI may be confusing.
Another small bug I found was that if you set the Shinobi SDI up to view HDR and you then turn the unit off and then back again, the monitor reverts back to all the standard settings. This was a major pain, as I had to go back into the menus and change everything again. When I asked Atomos about this I was told: “The Shinobi SDI will save settings if “HDR AUTO’ is turned off.”
Quick Tip
While having tools is great knowing how to use them is a must. Here is a quick tip on using the RGB functions with the Waveform to nail white balance.
With the color RGB active in the Waveform put a white or neutral grey card in front of the lens so the majority of the frame is covered. Now open the custom white balance function on your camera and enter the Kelvin temp option. Now adjust the Kelvin setting until the RGB lines combine and turn white. Get as close as possible and your done. Now the camera has an optimal white balance setting for the scene.
If your camera has a White Balance Shift option then you can fine-tune the WB even further.
HDR and LUT support
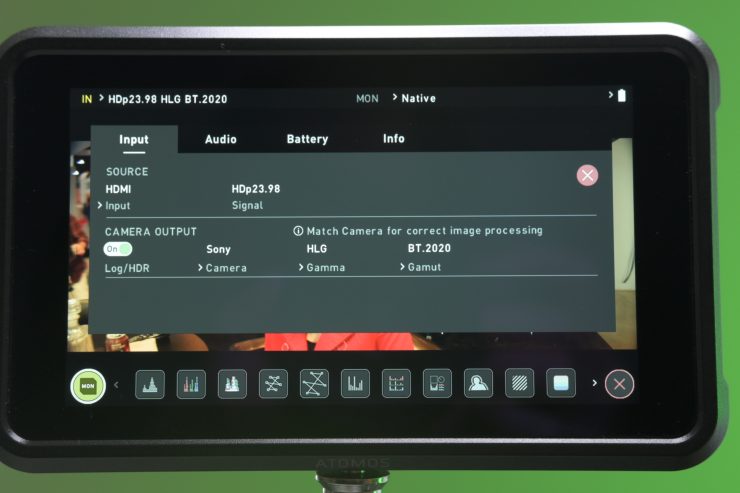
With most, if not all monitors in the sub $500 range they won’t have LUT and HDR support. This is a very nice option and one that is so handy to have if you shoot in LOG or HDR. The Shinobi SDI has both.
The monitor supports popular log formats from Sony, Canon, Panasonic, ARRI, RED, and JVC cameras. You can preview SDR or HDR LUTs in real time and choose from up to eight custom LUTs that you can load in via the SD card slot.
Supported Log Formats
- ARRI Log CEI160 / LogCEI200 / LogCEI250 / LogCEI320 /LogCEI400 / LogCEI500 / LogCEI640 / LogCEI800 /LogCEI1000 / LogCEI1280 / LogCEI1600
- Canon CLog / CLog 2 / CLog 3
- Fuji F-Log
- JVC JLog
- Nikon N-Log
- Sony SLog / SLog2 / SLog3
- Panasonic VLog
- RED Log3G10 / RED LogFilm
- PQ10k
- HLG
With AtomOS, you tell the Shinobi SDI what camera you are using, what Log you are outputting, and what gamut you are using. This allows the monitor to know exactly what it should be displaying. Now by doing this alone, the image on your screen isn’t going to magically start showing HDR. All it is doing is setting up the input parameters correctly.
To actually display an HDR image you need to press on another new item called “Native“. This brings up another menu that allows you to change your image.
If it is set on Native, then you will be looking at your Log image, if you select REC709, then you see a REC709 adjusted image. If you choose HLG or PG you will get an HDR image. And finally, if you select LUT, you apply a LUT to your Log image.
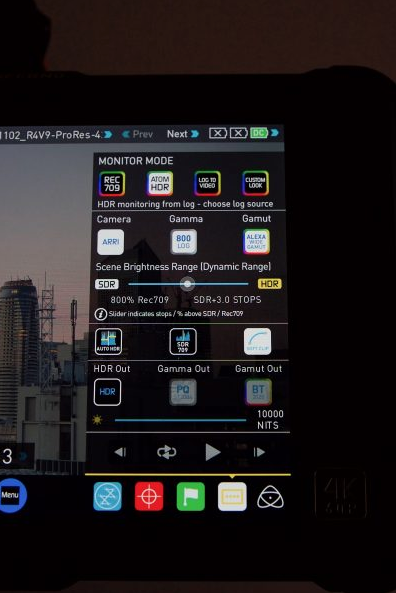
Above you can see the menu options for how HDR was done on the Shogun Inferno and Ninja Inferno. While the new system doesn’t have a slider or as many parameters that you can change I actually prefer how Atomos is now doing it. Back when the Atomos first introduced HDR into their products there really wasn’t any standards and a lot of what they were doing was based on what they thought was right. Now that there are fixed standards for PQ and HLG HDR, in my opinion, it is better to stick to those standards as it takes out all the guesswork.
Now just a word of warning. You don’t necessarily want to be monitoring in HDR or overexposing your image so it looks good on an HDR monitor. If you aren’t delivering in HDR and let’s face it, not a lot of people are, you are just going to make more work for yourself and potentially stuff up material that is intended to fit in a REC709 space. If you start lifting up your exposure because you think it is cool to monitor in HDR and then you hand your material off to a client who is going to edit and grade it for a REC709 delivery you won’t be getting any calls back for future work. I’m still very much a firm believer in exposing to get the correct results in camera.
While HDR is great and I hope it gets more widely accepted and implemented, it’s still in its infancy.
Keeping it cool
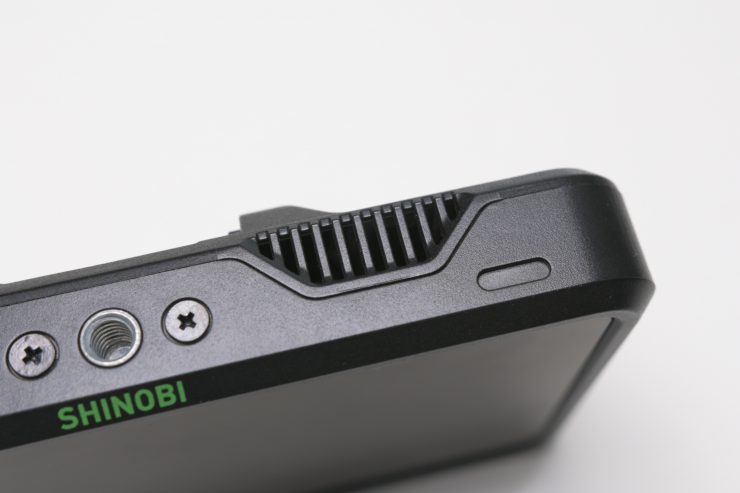
The Shinobi SDI doesn’t have a fan. If it does I can’t hear or see one. The monitor does have three vents. Two on the top and one on the bottom to keep it cool.
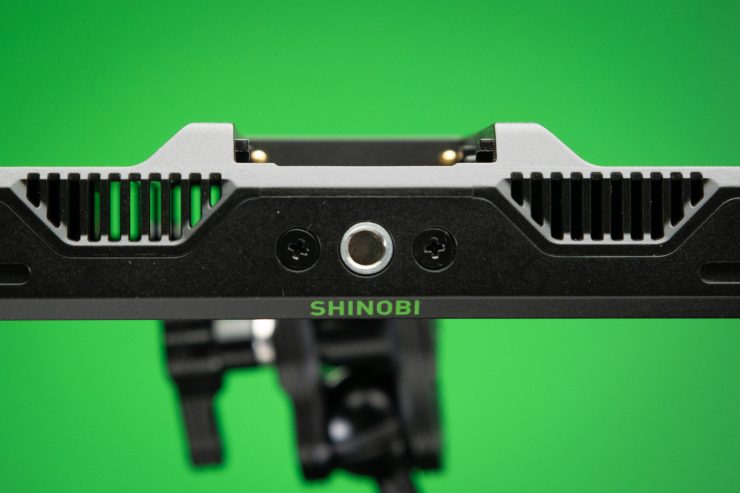
I can see right through the vents and also see the main circuit board inside and that does have me concerned. I’m not recommending using the Shinobi in bad wet weather or in a dirty dusty environment as particles will fit between the vents. I know I personally don’t shoot in such bad situations however if you’re a news or documentary shooter you never know where you will be shooting but it is something to be aware of to protect the monitor.
Atomos Shinobi SDI Inputs & Outputs
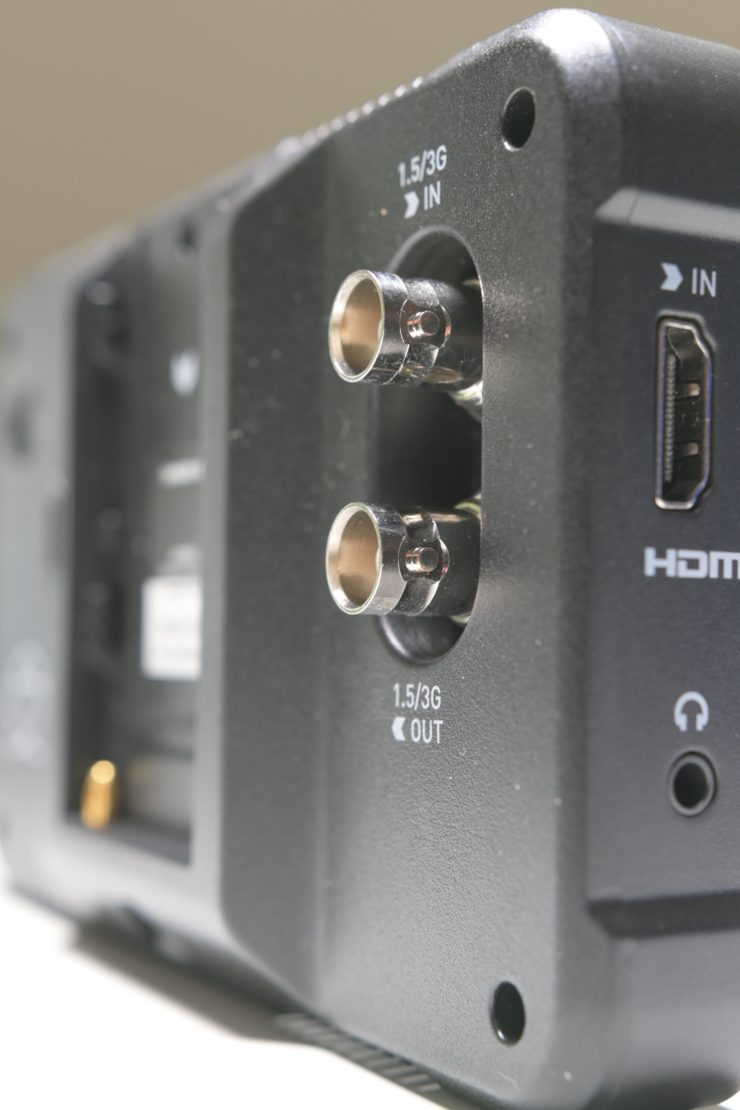
Unlike a lot of other monitors in this price range the Shinobi SDI has both SDI and HDMI inputs. This lets you choose to monitor DCI or UHD 4K footage via HDMI, or up to DCI 2K via the 3G-SDI input.
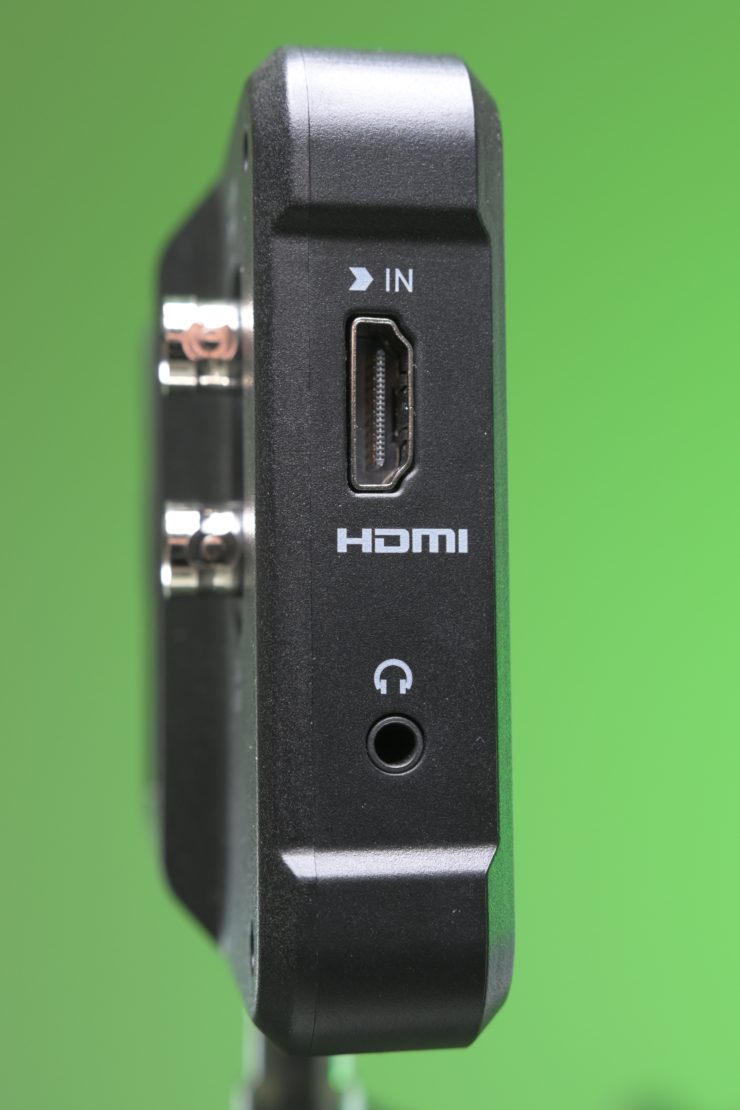
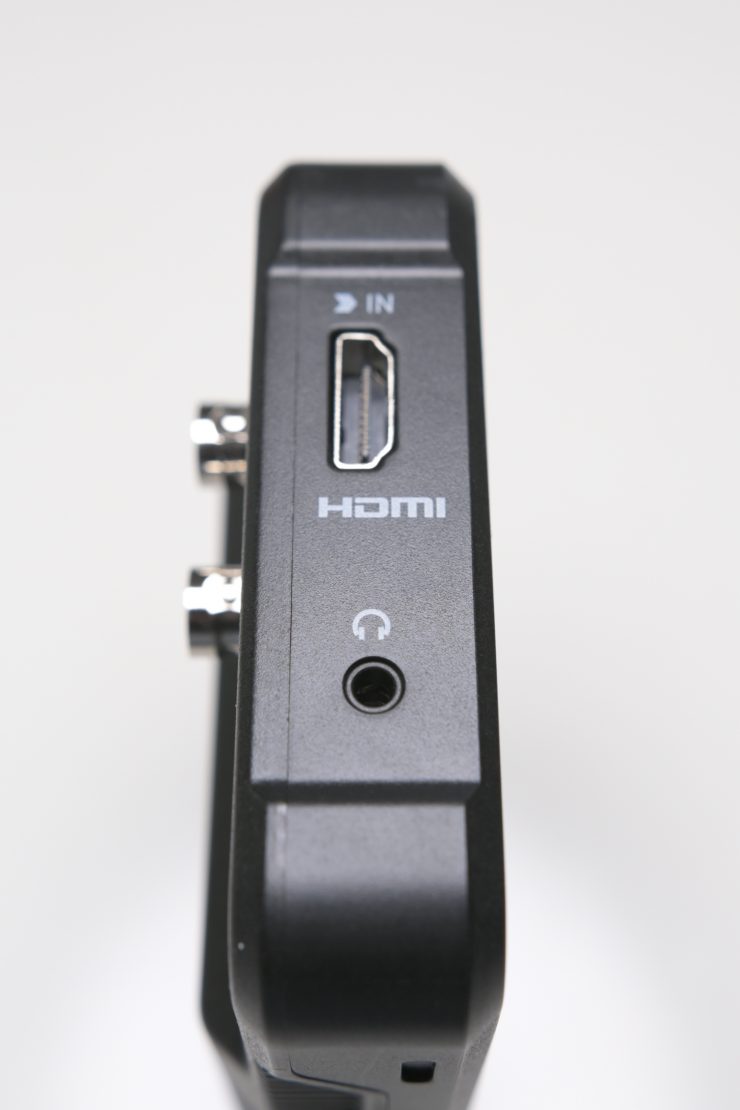
On one side, you have a 3.5mm headphone jack and a full sized HDMI input.
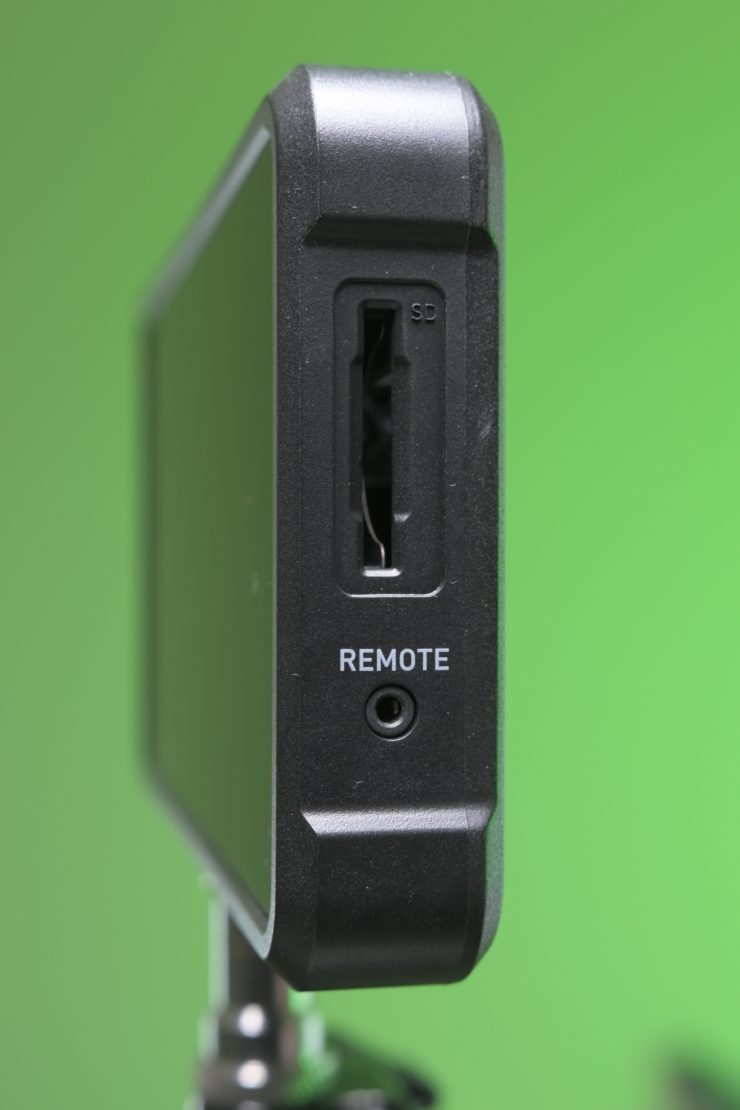
On the other side, there is a calibration 2.5mm jack and an SD card slot. The 2.5mm jack allows for the connection of the X-Rite i1Display Pro calibration device. The calibration unit utilizes the optional USB to serial adaptor cable. For optimal calibration, it is recommended that your Shinobi SDI is powered up for 30 minutes prior to calibration. The latest version of the Atomos Calibration software is available at www.atomos.com/support.
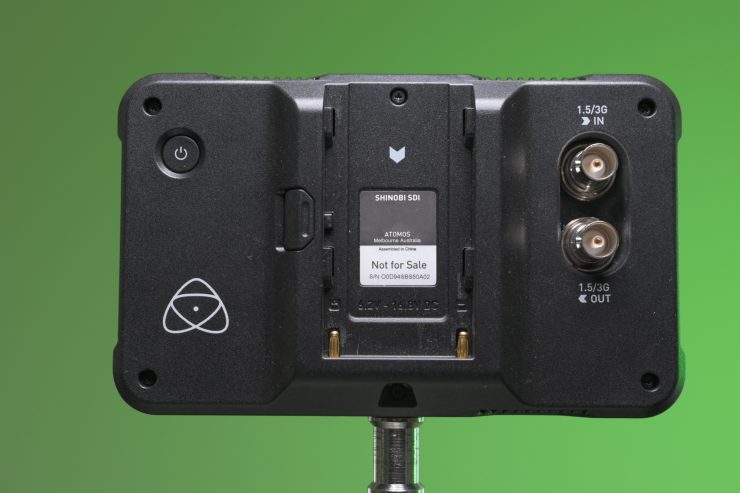
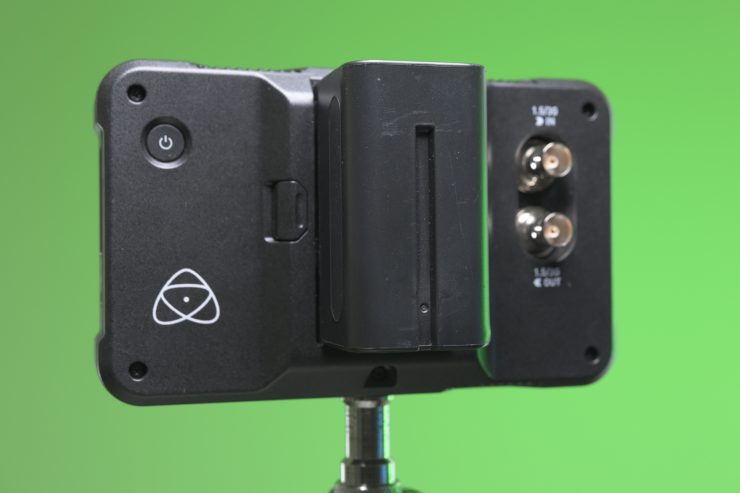
On the back of the unit you will find the power on/off button and 1.5G/3G SDI in and out ports. It’s a pity that Atomos has only chosen to incorporate 1.5G/3G SDI ports. This means that the monitor can only take an HD signal.
While I like where the placement of the SDI ports are, I’m still not a big fan of having the HDMI input on the side of monitor. The HDMI cable just ends up getting in the way and you are more likely to knock it on something. I would have prefered to have seen the HDMI input on the rear of the unit.
It would have also been nice to have seen Atomos incorporate some sort of built-in locking connector for the HDMI port. HDMI connectors are always the weakest link in the chain and easily come out and are very prone to breaking.
SDI Format Support
- DCI 2K: 59.94/50/29.97/25/24/23.98
- 1080p: 59.94/50/29.97/25/24/23.98
- 1080i: 59.94/50
- 720p: 59.94/50
HDMI Format Support (8/10-Bit 4:2:2)
- DCI 4K: 29.97/25/24/23.98
- UHD 4K: 29.97/25/24/23.98
- 1080p: 59.94/50/29.97/25/24/23.98
- 1080i: 59.94/50
- 720p: 59.94/50
Battery life
Atomos products were never known for having very good battery life, but the Shinobi SDI lasts much longer than any of the older Atomos products because it doesn’t have to power a recorder.
The Shinobi SDI draws 4 W (Typical) and 7 W (Maximum).
BATTERY LIFE BASED ON 7.4V
| 2600mAh | 2 hours 30 minutes |
| 5200mAh | 5 hours+ |
| 7800mAh | 8 hours+ |
Headphone monitoring
It’s nice that the Shinobi SDI has a headphone jack. Now the only problem with the way headphone monitoring works is that you can’t just listen to a single channel. If for instance, you are using two microphones going into channels 1 and 2 you can’t just listen to channel 1 or channel 2 from the Shinobi SDI. Through your headphones, you will hear channel 1 through one ear and channel 2 through the other. This is far from ideal and I’m not sure why Atomos hasn’t changed this. I raised this problem going all the way back to when the original Shogun was released.
Even though I found the monitoring to be a problem, it is unlikely anyone will be monitoring from the monitor and not through their camera.
Competition
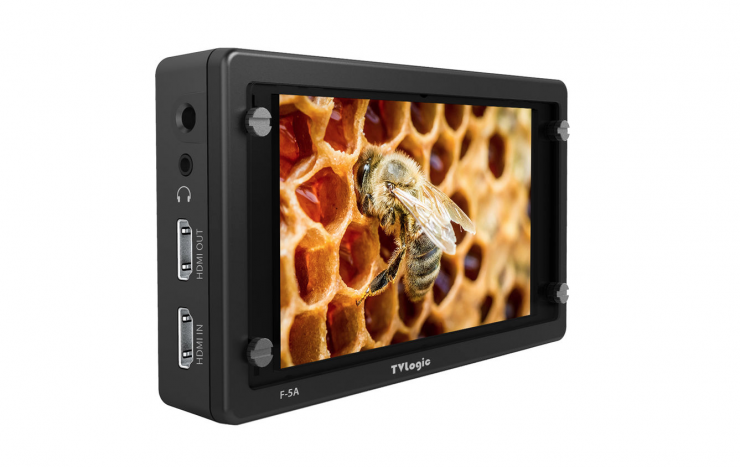
There are a lot of 5″ monitors already on the market and others that are soon to be released that could be considered direct competition to the Shinobi SDI. These include:
- SmallHD 502 Bright On-Camera Monitor $999 USD
- SmallHD 5.5″ FOCUS OLED Monitor (SDI) $699 USD
- SmallHD FOCUS 5″ Base SDI On-Camera Monitor $499 USD
- TVLogic VFM-055A 5.5″ OLED On-Camera Monitor $805.50 USD
- TVLogic F-5A 5.5″ IPS On-Camera Monitor $850.50
- Portkeys BM5 5″ 2000nit monitor $499 USD
Probably the closest competitor is the SmallHD FOCUS 5″ Base SDI On-Camera Monitor which also retails for $499 USD. So let’s have a look at the differences between the Atomos Shinobi SDi and the SmallHD FOCUS 5″ base SDI.
| Atomos Shinobi SDI | SmallHD FOCUS 5″ SDI |
| Panel: IPS-Type LCD | Panel: IPS-Type LCD |
| Display Size: 5.2″ / 13.2 cm | Display Size: 5.0″ / 12.7 cm |
| Screen Resolution: 1920 x 1080 | Screen Resolution: 1280 x 720 |
| Aspect Ratio: 16:9 | Aspect Ratio: 16:9 |
| Touchscreen: Yes | Touchscreen: Yes |
| Maximum Brightness: 1000 nits | Maximum Brightness: 800 nits |
| Bit Depth / Color Support: 8-Bit+FRC (1.07 Billion Colors) | Bit Depth / Color Support: 8-Bit+FRC (1.07 Billion Colors) |
| Pixels Per Inch (ppi): 427 ppi | Pixels Per Inch (ppi): 294 ppi |
| Color Gamut: 100% Rec.709 | Color Gamut: 70% NTSC |
| Video Inputs: 1 x BNC (3G-SDI) Input 1 x HDMI Type A (HDMI 1.4) Input | Video Inputs: 1 x BNC (3G-SDI) Input |
| Other features: 1 x 3.5 mm Headphone Output, SD Card Slot | Other features: 1 x 3.5 mm Headphone Output, 1 x 3.5 mm Line Input, SD Card Slot |
| Weight: 7.97 oz / 226 g | Weight: 6.1 oz / 173 g |
| Construction: Polycarbonate | Construction: Not specified by manafacturer |
| Power Consumption: 4 W (Typical) 7 W (Maximum) | Power Consumption: 5.04 W |
On paper, the Shinobi SDI vastly outperforms the SmallHD with a full HD screen, much higher ppi, an HDMI and SDI input, SDI output, and it’s brighter.
I have never tested a SmallHD FOCUS 5″ so I can’t say how it compares against the Shinobi SDI in the real world.
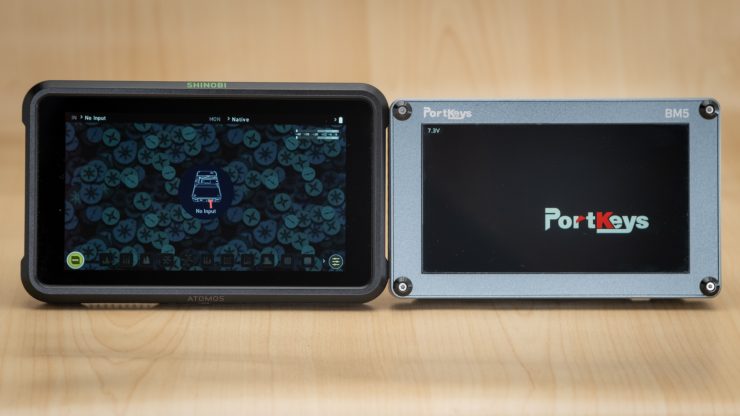
Another serious contender would also be the Portkeys BM5 5″ 2,000 nit monitor which Erik recently reviewed.
PORTKEYS BM5 KEY FEATURES
- 2000 nit full HD IPS screen
- 3D LUT upload via USB
- Waveform, RGB Parade, False Color, Vectorscope, Zooming, Zebra, Peaking, Zoom
- Waveform SDI Output
- Guides, Check Field, Grids
- Audio Meters
- Image Flip
- Backlight – Low, Medium, High
- Color Temperature, Custom RGB (Manual temperature calibration with RGB controls)
- Display Flip, OSD Flip
- Cross Hair
- Camera Control
- SDI TALLY
- HLG
- H/V Delay
- Aspect
- Brightness, Contrast, Chroma, Sharpness, Tint
- UnderScan
- 3D LUT SDI Output
Conclusion
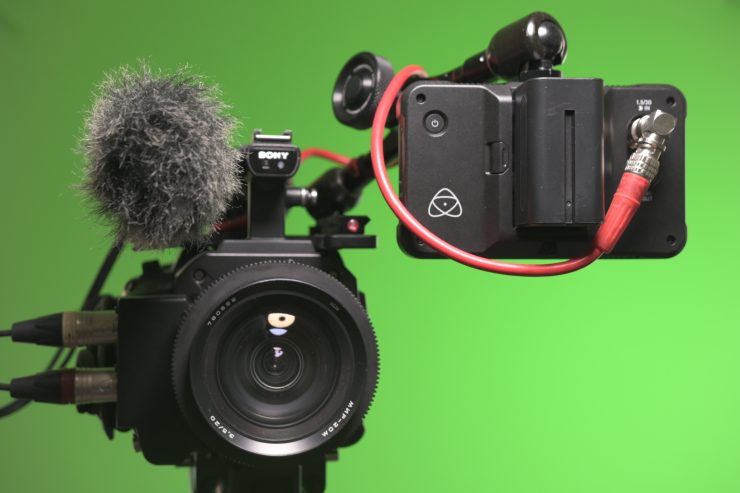
The Atomos Shinobi SDI is competitively priced at $499 USD. Despite there being a plethora of 5″ monitors on the market you also don’t see many in this price range that support LUTs and HDR.
Making a decent 5″ display these days is not that difficult, and if that is all you are after you can find reasonably decent examples for a few hundred dollars. What separates the good and great monitors from the average is the software and OS. For me those things are key. If a monitor has poor software and badly integrated monitoring assist tools then what good is it? With any monitor, usability should be right up there at the top of your list when you are deciding what to buy.
While the AtomOS system is pretty good I don’t personally find it as fast to use as SmallHD’s Page Builder OS, but none the less it’s still a lot better than most other competing options.
I think the Atomos Shinobi SDI is a worth looking at if you are after an HDMI and SDI capable on-camera monitor that is lightweight, has a nice screen and operating system, and is under $500 USD.

