Beginner’s Guide to Live Streaming
By Adam Noyes
Live streaming has become a larger and larger essential in many areas such as education, corporate organizations, houses of worship and more in the past year. While professionals in all of these areas were forced to jump head first into the streaming landscape, many of them are still beginners that were simply forced to adapt.
Streaminglearningcenter.com recently posted a great article detailing how to get started in live streaming. We’re going to be taking a look at some highlights from that article, below.
What is Live Streaming?
Live streaming is a one-to-many technology that:
- Inputs a single video stream from a camera or video mixer
- Transcodes that stream into multiple streams to deliver to viewers watching on different devices over different connections
- Packages the streams for delivery via an adaptive bitrate technology (ABR)
- Delivers the stream to the viewers
- Enables playback on their devices
Typical applications for live streaming include sports, performance arts, religious services, governmental meetings, and many other sources of content. Most live events that you can watch via the internet in real-time, while the event is occurring, are produced via live streaming.
Live streaming is different from conferencing, where multiple participants send relatively low-quality video streams to each other. It’s also different from webinars, which again typically involves a single relatively low-quality video stream that is not delivered via ABR technologies.
How Live Streaming Works
Live streaming involves the five steps shown in Figure 1. First is capture where the feed from the camera or video mixer is encoded and uploaded to a service in the cloud. There the video is transcoded into multiple streams to deliver to different viewing platforms connecting at different speeds. Next, the video is packaged to meet the precise requirements of the adaptive bitrate formats deployed.
Figure 1. The five processes involved in live streaming.
At this point, the video is ready for delivery, so it’s transferred to a content delivery network, or CDN, for delivery to the individual viewers. To watch the video, each viewing platform needs a video player that runs on that platform.
Let’s take a quick look at the individual steps.
Capture
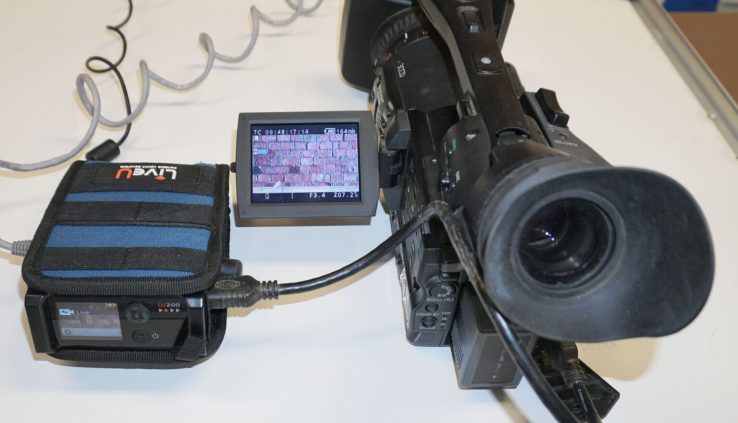
During a live event, a single camera or multiple cameras capture the action. With single-camera productions, capture involves connecting the camera to a capture device that can input the video, compress the video for more efficient transfer to the cloud, and then upload the stream to a service in the cloud for further processing. You see a simple capture scenario in Figure 2, where a single camera is attached to the LiveU Solo, which encodes the stream and delivers it to a cloud service.
Figure 2. Capturing a single camera shoot with the LiveU Solo.
When multiple cameras are involved, the video is processed through a video mixer that switches between the cameras and provides functions like titles, graphics, instant replay and others. Some video mixers can compress the output and transmit the streams to a cloud service for further processing. Others can’t, so again you’ll need a separate device to capture the video, compress it, and deliver it to a cloud service.
There are many, many forms of capture devices, from $30 dongles that connect to a computer USB port to $50,000 boxes that can process multiple inputs simultaneously. There are also many types of video mixers, from free open-source software programs to mixing appliances that cost well over six figures. From our perspective, all we care about is that the device or software program can encode the video and deliver it to the cloud.


