Best Practices for Live Audio Mixing
By Adam Noyes
In 2014, I made a presentation at Streaming Media West covering all the various ways an “Audio Mixing Ninja” gets the best audio possible. When it comes to live audio for streaming (Figure 1, below), there are a few additional wrinkles to consider that don’t come into play with audio recording when you aren’t streaming live.
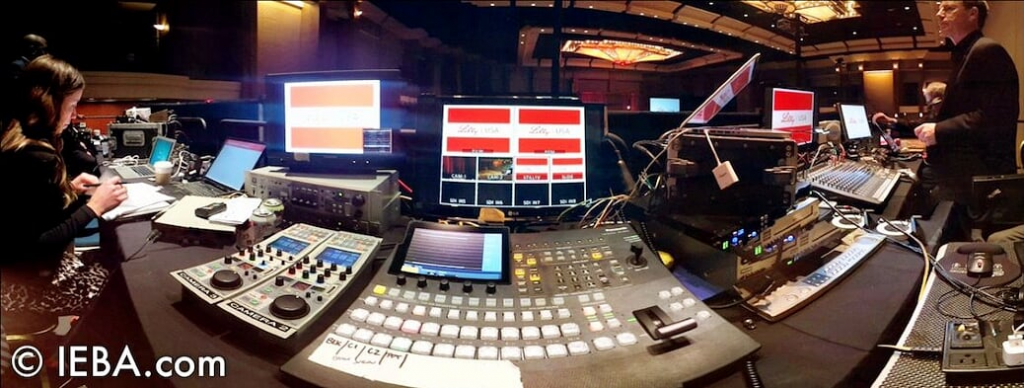
Figure 1. It takes a team to live stream, from producers, video, audio, lighting.
Fading, Limiting, and Compression
Let’s say my audio is masterful. No hiss. Nice, strong, clean audio. That means I’ve mastered the input trim on the microphone I’m using—especially those on wireless transmitters—and set it so it’s not so loud that the audio clips, and not too quiet that it forces me to increase gain, producing additional hiss.
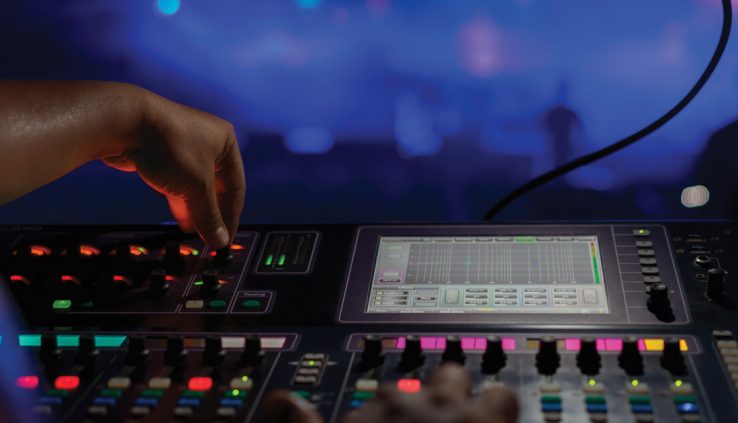
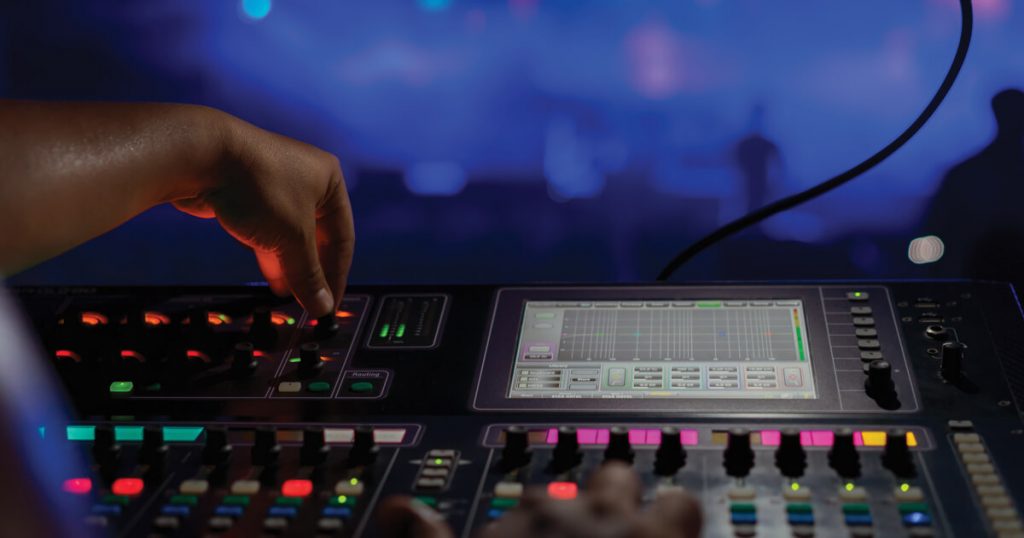
The same goes for the audio mixer (Figure 2, below). With upward of four places I can adjust a single microphone’s audio, it’s easy to get lost. If my mixer has the ability to solo a channel, I’ll use that and have my subjects speak at “program level” while I adjust the input trim. This is key. They need to act like it’s the actual event and speak, sing, play, shout, at that same level.

Figure 2. Four of the main ways to adjust audio levels on a mixer
If I’m doing sports, having the engineer set a level while saying, “Hello, hello, 1, 2, 3, 4” at a conversational tone is nothing like the level at which the announcer will be shouting during a fantastic play. I need to be aware that live events will have much more dramatic audio than, say, a low-key corporate webcast, and adjust my levels accordingly.
Then I have the channel fader to bring up quieter parts of the discussion and bring down the loud parts. Perhaps there are submix groupings (all the stage mics, versus all the floor mics), and then there are the master faders. But what helps even out all these levels after the mixer are the limiters and compressors.
While the two terms are often used interchangeably, the two are not the same thing. A limiter, like a limit, means “No more than this.” It works to stop the audio from getting any louder than a given threshold. Usually, I can set where that threshold is, and that’s pretty much it. While this achieves the purpose of not allowing the analog audio to clip before being digitized, it can sound strange when audio has normal dynamics one moment and suddenly doesn’t the next.
A compressor, however, can vary its limiting effects on a curve depending on how loud something is (Figure 3, below). For instance, something quieter can have less compression. And, as it gets louder, the compression level can be set to increase, until it has the most compression at the loudest point. There are even combination limiter/compressors.

Figure 3. Some of the many ways a limiter/compressor can be set
What these limiters and compressors do is keep the loudest part of our audio from hitting the digital zero—where it clips and creates a “square wave,” as opposed to a smooth sine wave. This digital clipping, in most cases, sounds awful for our uses. Although musicians can use clipping differently to create specific audio effects for instruments or voices, that’s not what we’re after here.
Clipping is to be avoided as much as possible. However, I’ve heard clipping audio even when the faders on the mixer were not up that high and the output of the mixer was going into a compressor. The operator was confused because the output level was being properly handled—it was low, not in the red—yet it still sounded bad.
But the operator forgot that audio clipping can happen at the input of the mixer (input trim) or even at the input of the wireless transmitter, if there is one. No matter how I adjust it later, if it clips at an earlier stage in the audio chain, no amount of lowering the audio level at later stages will fix the clipped audio; it just makes it quieter.
If I’m looking at the mixer, or the compressor, and nothing is clipping, the audio can still be distorted if the person speaking is shouting to an audience, cheering a goal, or simply beyond the audio input levels at any stage of the process.
Frequency Clipping
Another thing I need to consider is that clipping can occur where any particular frequency hits maximum level. But clipping LEDs don’t indicate which frequency is clipping. There might be bass frequencies from a body mic that clip well before the upper frequencies simply because of microphone placement, or handling noise, or even wind. This is so common that mixers often have a “high pass” filter, also known as a “bass roll off,” to lower the handling (wind noise) in outdoor events.
Wind noise can be an animal unto itself. How do they get such clean audio in such windy situations in the movies? They redub everything. But in a live stream, we don’t have that luxury. So those audience mics in the stands at the outdoor game could become nothing but noise as the winds of a cool front move in. Or a poorly placed room mic just might be directly under the HVAC vent, and thus it becomes unusable every time the air conditioner kicks on. Or the lav mic is placed high on the chest of a noisy breather, etc.
There are windscreens (Figure 4, below) available for all kinds of mics, from little lavaliere windscreens and handheld mic windscreens to blimps for shotgun mics. But I’ve been in situations where some nylon mesh on the mic, under the foam, inside the blimp, with a dead cat on it, was still getting intermittent wind noise. So sometimes in addition to accessories, some crafty placement (behind a pole, under an overhang, etc.) is required.

Figure 4. A handheld mic windscreen
Often wind noise is so broad-spectrum (spanning all the frequencies), there’s no simple equalizer adjustment or filter to get rid of it completely and give me clean, pristine audio. I can only protect the mic better from the wind, use the noisy audio at a lower level, or not use it at all.
However, I need to consider that, if my live stream involves a weathercaster in hurricane winds, some wind noise is actually desired. If the audio is too clean, it can sound fake. So I need to think of the overall situation and adjust accordingly.
Feedback
One of the biggest challenges for a single operator mixing for both the room and for the stream is understanding and handling the different needs for each. The remote audience benefits from hearing the audience in the live stream mix, just as the audience in the room hears everyone around them. So to get everyone laughing at a joke, I need microphones in the audience.
However, what I want to avoid at all costs is feedback. That (usually) high-pitched squeal kills us when the audio from a microphone in a room is taken in, amplified, and played back into the room, where that same microphone picks it up, amplifies it again, until (sometimes in less than a second) it becomes ear-splittingly loud.
I never want to use any mics in the room—or in front of the speakers—in the mix that is feeding the room. But that never stops someone with a handheld mic from walking into the audience or getting too close to the speakers in the room. When this happens, it can become a real challenge to manage the audio levels without feedback.
This is why there are dedicated professionals for live audio. They can use specialized equipment and processing to “sound out” a room and find the frequencies waiting to cause problems (Figure 5, below). Then, when the room is filling up with an audience, they do it again. They make live stage shows a pleasure to watch. If there’s a way they can give the streaming crew a “board feed” of the live show, that’s best. Meanwhile, we let them do the job they’re already great at.

Figure 5. Identifying problematic frequencies in a waveform can help prevent feedback.
Crewing for Live-Stream Audio
Then we have a second audio person for our live stream. This person captures additional audio for the viewers not in the room. This division of labor is the best way to do it. But if the labor can’t be divided, I recommend dividing the mixing boards. I’ll have two smaller mixers, right next to each other to make sure things stay separate. If you’re trying to do it all on one mixer, I feel it’s too easy to turn the wrong knob or press a channel assignment button and immediately have everyone in a room covering their ears. Keeping these two signal paths separate is the easiest way to avoid that.
Even within the room mixer, getting sound right for the stream can still be a challenge. Let’s say you’re producing a corporate webcast announcement for a company with a new glass building with a marble floor. There are processors the audio engineer can put in line like the Behringer Shark (Figure 6, below), to digitally notch those frequencies during the event before we even hear them. The other solution is to manage overall audio level in the space, which means working with the AV provider, so that many small speakers at low volume are spread out through the venue instead of a couple speakers on the stage at a very high volume.

Figure 6. The Behringer Shark FBQ100 Automatic Feedback Destroyer
Additionally, there are digital mixers that can “gate” microphones with audio below a threshold I set so they don’t add to the total overall audio level. These mixers quickly un-mute themselves automatically when each person speaks. It’s semi-automatic audio mixing (Figure 7, below). Couple this with some compression on the output, and after I tweak it a couple times, the mixer can deliver great audio without me having to adjust each microphone’s fader up and down as each person speaks.

Figure 7. The auto-mixing capable Roland V-60HD
Sometimes, budgets don’t allow for as many people as we’d like, and often audio is one of the first line items to get cut. We’ve all been there. I flip a couple mics on, set the levels. We’re good, right? But without a dedicated person listening, and focusing on, the audio, it’s easy to miss when things start going downhill.
Let’s say we’re streaming a conference presentation, a question comes from the audience. We can hear it because we’re in the room, but we forget to pay attention to the audio going out to the streaming audience. Before we know it, we’re getting messages that the stream has no audio. Or, one of the wireless mics starts to quietly drop out intermittently as the batteries fade. Audio can be deceptively easy, making us forget to keep our attention on it.
If I can’t have a person dedicated to audio, then making sure I have ears, or at least one ear, on it at all times is key. Second to that is a good set of audio meters. And I don’t mean the tiny little audio meters tucked away in the corner of the window of an external monitor/recorder; I mean a dedicated set of audio meters I can see at a glance from several feet away.
Better than that is, of course, listening. The challenge comes as we whittle down the crew list and the director/tech director is also running sound while calling the shots over coms. Some people do one ear on each—a good set of headphones on one ear, with the com headset on the other ear. Some people use good audio earbuds underneath the com headsets, and then adjust the levels of both.
Neither is really a great solution. They are both compromises, in terms of both attention and the quality of listening. If I’m wearing com headsets over earbuds, without a bit of headset-swapping, I can’t be sure if the source of buzz in the audio is from coms or program audio. I don’t care if the com headsets buzz, but I do care if the program audio has a buzz.
So I tend to be a single-ear-per-use kind of person when forced to pare down the crew. If at all possible, I make sure there’s an audio person so I can hand off all the potential problems in this entire article, and more, to a dedicated person. Let them set it up, figure it out, worry about it, fix problems, etc. Let me focus on the stream.

Call-Ins and Mix Minus
Then I have times when I need to have someone call-in, or Skype into, a program I am producing. This seems simple enough: I wire their feed from the laptop (or whatever they’re using) into the audio mixer. But it’s actually far more complex, because the caller also needs to hear the people on stage, the main program, come back to them—but without the caller’s own voice in the mix.
This is called “mix-minus.” It’s the main mix, minus that caller. And if I have more than one caller, then I need to have multiple, unique, mix-minus audio streams going back to each device. It sounds complex. And trying to figure out the wiring and audio routing on my own, with a normal audio mixer and some aux buses, can get tricky.
But this is actually something that’s so common, and has been around for so long, not only are there hundreds of online tutorials to get us there, there are also dedicated products made specifically to handle integration with phones or Skype. Whether it be a JK Audio landline or cellular interface, or the new RODEcaster Pro audio mixer (Figure 8, below) handling two cellphones at the same time as four microphones, there are numerous solutions for call-ins.

Figure 8. The mix minus-capable RODEcaster Pro audio mixer
There are even solutions for video, like NewTek’s Skype TalkShow with professional I/O for the production truck and audio. Keep in mind that I also have to send program video back to someone on Skype so they can see what’s going on. The live stream may be delayed 20–30 seconds, so that doesn’t work when someone in the program asks the remote guest a question. Video adds another layer of complexity to an already complex solution.
Backups
We all know about backups. But how many times does a client ask for one more mic, or tell you there’s an extra panelist? Then something goes amiss, and there’s simply nothing else. Having additional backups, or alternative solutions, can be key to making a show run smoothly.
Alternatively, having the presence of mind to shift gears and use two table mics for a table panel of four, as opposed to the four lav mics that became three. Having an additional mic on standby—hooked up, tested, and ready to be put into use if (when) something stops working—is not just plan B, but actually should be part of plan A.
Where is your bag of converters? We need to interface with all kinds of setups, and locations, so if the hotel AV gives me an RCA, 1/4″, or XLR for the house audio, I have to be ready to integrate it into my system. Ground loop hum? Do I have a humbucker, audio isolator, or ground lift at the ready? What if the 1/4″ TRS is dual mono, as opposed to balanced audio? If I plug it into my mixer TRS input, the line sounds dead, but it’s not. XLR M-M and F-F barrels. XLR pads. Splitters. XLR to Hi-Z and reverse. Everything in reverse. It is all in a big grab bag that comes with me to every gig.
Experience
Experience brings success. There are always people new to the industry, but there are a lot of experienced veterans out here as well. There’s no need to try to run the entire show your first time out when you can bring on an experienced hand who not only helps make the show run smoother and easier, but who also can impart a lot of that wisdom and experience to be passed down.
Those with enough experience have already worked through almost every problem there is and either have contingencies they do automatically, or are not rattled by surprises and are able to smoothly shift to plan B, C, D, etc., to get the job done. It’s like live theater: The show must go on. The curtain will rise, and it’s up to us to make it sound great.