Streaming Tutorial: Multi-encoding with Epiphan Pearl
By Jim Bask
Multi-encoding your video – What, when, why and how!
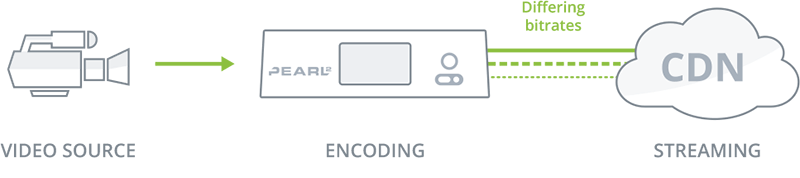
Streaming a switched channel at multiple bitrates
In last week’s blog post, we talked about multi-bitrate and adaptive bitrate streams. That post dealt with delivering multiple encodings for the viewer’s needs, and this post deals with multi-encoding videos for the needs of the content creators.
What is multi-encoding?
Multi-encoding is a feature on both Pearl and Pearl-2 that lets you get the most out of your live event production. It is the practice of encoding your produced live program multiple times, and it allows you to use the same video program for many different purposes by the use of different encoding settings or destinations.

When would you use multi-encoding?
- To record at a high bitrate/frame size and stream at one suitable for your bandwidth
- To stream a switched program to multiple CDNs
- To stream to a single CDN at multiple bitrates / frame size
- To have a lower quality external stream and high quality local stream
- To include your switched live program as part of another layout
- many other uses!
Of course, multi-encoding isn’t always the answer you need, so let’s also look at when might you not need multi-encoding for your program.
- If you’re recording one static source per channel (no switching)
- If you have enough bandwidth to stream at the highest possible settings
- If you don’t need a high-resolution, high-bitrate recording
Why is multi-encoding the best solution?
As you can see in the list above, creating multiple simultaneous videos with Pearl and Pearl-2 lets you accomplish a lot, and it’s this versatility that makes it so useful. This one technique lets you live-switch your program simultaneously in multiple streams and recordings, and still optimize the video’s appearance on every platform you’re using.  A video encoded a video in only one way will work well on some CDNs, but not all. Multi-encoding gives you the full range of options with every video. You don’t need to create one video for a recording and one video for live stream, you don’t have to worry about your video not being set correctly for different CDNs and you don’t need to keep the quality of your recording low just so you can get it online. Multi-encoding lets you use each video to its full potential, and ensures that your video program is optimized in the way you want it for every platform. So the obvious next question is…
How do you use multi-encoding?
Using Pearl and Pearl-2, you can multi-encode your video either with an RTSP stream or an HDMI output cable. Option 1: Follow these steps to use an RTSP loopback: 
- Create Channel 1 with your video and audio inputs, live switching layouts, and encoding settings.
- Go to your Channel Status screen, and copy the RTSP stream link from Channel 1’s status page.

- Add a new RTSP source. Use the link you just copied in step 2 as the Source URL, which will make the video from Channel 1 the RTSP source.

- Create Channel 2 with just one layout and add the new RTSP source you created in step 3.
- For Channel 2’s audio source, again make sure to choose audio from the RTSP source you created in step 3.
- Set encoding and streaming settings for Channel 2.
Option 2: Follow these steps to use an HDMI loopback: 
- Create Channel 1, using all the video and audio inputs that you want to be part of the video.
- Add all your layouts, and make sure they’re ready for any live switching you wish to do.
- Configure a video output port to display your channel. On Pearl, you use a DisplayPort output, and on Pearl-2 it is an HDMI output. Create the encoding settings you want.
- Connect your DisplayPort or HDMI output back into your Pearl or Pearl-2 system using an available HDMI input port on your system.
- Create Channel 2 with just one layout and add the new HDMI source you connected in step 4 as the sole video source.
- Ensure you select the right audio! Set the audio input to your HDMI input. (If you accidentally use the original audio source you used in Channel 1, this channel will have desynchronized audio).
- Set encoding and streaming settings for Channel 2. If Channel 2 is the channel you’re choosing to stream online, its settings will probably be much lower than Channel 1.
Making the most of multiple channels
These are far from the only uses for multi-encoding. There is lots of versatility to using a single channel on Pearl or Pearl-2 as a source for the other channels, allowing you to keep the exact same live-switched video and use it however you want. Use it as part of a layout, put new overlays on it, use another audio track to comment on it, or simply use different encoding settings as outlined above. What do you want do with your video?