Everything You Need to Know About Chroma Key and Green Screen Footage
By Adam Noyes
In this guide, we’ll walk through everything you need to know about green screen backgrounds and achieving a perfect chroma key.
The use of green screens has come a long way over the past few decades. Technology that was primarily reserved for Hollywood blockbusters and local news stations is now utilized by many of your favorite YouTubers. Here, we’ll guide you through the entire process of using green screen backgrounds from start to finish. We’ll talk lighting, cinematography, keying, and common mistakes.
What Is Green Screen and Chroma Keying?

Image via Marvel
Before we jump into how to use a green screen, let’s learn what a green screen actually does and familiarize ourselves with a few key terms.
Green Screen: Technically, this term refers to the colored background you want to make transparent and remove from your shot. This is usually a single colored backdrop, which can be any color, but is usually bright green because it is the color furthest away from human skin tones. (Blue screens were frequently used in the early days with film, and might still be used in certain cases.) Sometimes the term is used as a fit-all for the entire process of keying (see below).
Chroma Key: This popular term goes hand-in-hand with green screen. It’s the actual technique of layering, or compositing two images based on color hues. Every color has a chroma range, hence where the terminology comes from.
Keying: This term is used to describe the process of removing the green screen background in post-production using video editing software. When the green screen background has been keyed, it will be fully transparent. Then you can fill in that transparent area with a different image or video. The goal is to get the cleanest key possible, meaning there are no digital artifacts left on your image where the green screen was originally.
Spill: This often refers to the colored light that reflects back onto your subject from the green screen. When a green screen is brightly lit, the light can actually reflect that color back onto your subject. There are a number of steps you can take to prevent spill, which we’ll discuss below.
Rules of the Modern Green Screen
The principles we use for overcoming the challenges of green screen are based on those from years ago, before we had digital compositing and video editing software. As you can imagine, the tools have changed quite a bit with modern video advancements. Here, we’ve broken down the new rules for working with green screens.
1. Start with the right green (or blue)
Use a non-reflective green screen material and look for colors such as “chroma key green” and “digi green.” These colors are toned to be ideal for use with green screens. Alternatively, blue screens can also be used, especially for replicating night scenes. Learn more about the green vs. blue screen debate to figure out which color is right for your shoot.
2. Separate your subject from the background
Keep your subject at least six feet away from the green screen. This helps minimize spill and unwanted shadows appearing on the green screen background.
3. RAW is King
Film with the highest bit-rate/least compressed codec you can. 10-bit color will be superior to 8-bit. ProRes 442 and 444 are always great options and RAW is even better if you have that ability.
4. Expose the background properly
Light your foreground and your backdrop separately. It is also important to light your green screen backdrop evenly. Proper lighting exposure helps to avoid excess green lighting spill.
5. Eliminate motion blur
Filming with a faster shutter speed reduces motion blur and helps provide a cleaner key. You can always add secondary motion blur back in during post-production.
6. Let the software do the work
Utilize chroma keying specific software, like the Delta Keyer in DaVinci Resolve, to get the best key quickly.
How to Shoot a Green Screen Scene
This article expands on the following tips and will help you get the best chroma key composites on set.

Image via The Walt Disney Company
It is crucial to plan ahead and visualize your final scene when shooting with a green screen. Concept art and storyboards can help with this process. But your main goal is to determine what is real and what is not in your scene. This means you want to know what will physically be in the scene, and what will be added in later during post-production. If your scene is particularly complex, with layers of green screen, you’ll want to establish a clear guide to everything.
In certain cases, you may need real props on set that your actors can reference. In behind-the-scenes shots you will often see tennis balls hanging on the green screen set. These provide the actors with visual reference points. Lighting is another huge consideration. Think about lighting your character in order to match the lighting of the environment they will populate. This will make a drastic difference when it comes to the final chroma key composite, and layering everything together.
In this section, we’ll cover all the steps and considerations for completing a green screen shoot. Here’s what we’ll dive into:
- Planning
- Lighting
- Clean Chroma Key
Step 1: Planning Your Green Screen Shoot
Determining Scale
This is the time to calculate the scale of your final scene and the best lenses for filming your actors. If you are planning on creating a wide-angle scene, it makes sense to film your subjects at the correct scale. This process primarily relies on knowing the field of view of the lens used to film the background element, which is often referred to as a background plate. It’s essential that you shoot both the foreground and background with the same focal length lens, or at least as close as you can guesstimate if you don’t know the lens used to film the background plate.

Image via Mark Vargo, Do the Math: Planning Your Green Screen Shoot
One thing worth noting is that the wider the background shot is, the larger the green screen will have to be in order to completely film your actors. Luckily, Mark Vargo walks us through this process in this article, which utilizes the lens field of view to calculate the final green screen size required for any shoot. The more notes you have from the original background shot (such as lens, time of day, etc.) the easier this process will be.
As a rule of thumb, wider shots that capture your actor’s entire body and action shots that require lots of movement will need a full green screen that also covers the ground, and maybe even the side of the shot. If this is the case, make sure the screen has no edges so that you can key in easily. You’ll want to use a curved screen and drops without hard edges to the floor or to side walls.
Prepping Actors and Objects
You’ll have to prep actors and props for use on green screen. Obviously, avoid green! Actors shouldn’t wear green or they’ll end up transparent in the key. You should also avoid shiny objects, as these can reflect the green and cause transparent spots. If reflective objects must be used, you will likely have to manually mask around those objects in post-production. This can be very time consuming, so plan ahead if that is ultimately required.
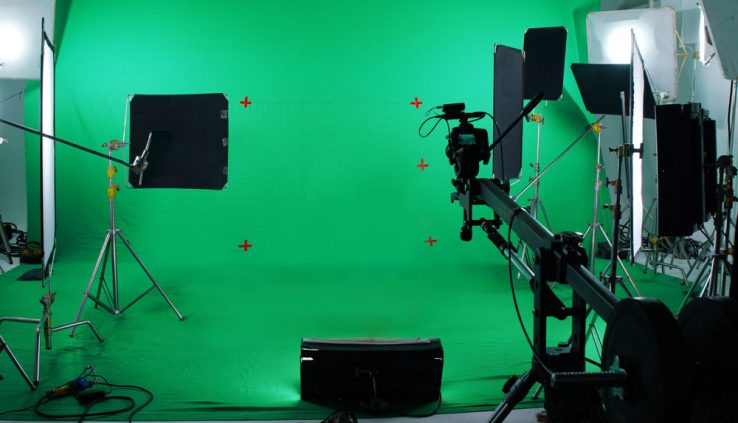
Step 2: Lighting a Green Screen

Image via Warner Bros.
There are three non-negotiable rules to lighting a green screen:
- The lighting must be even
- The lighting must be soft and diffuse
- The green screen must be lit separately from the subject
When lighting your green screen background, the goal is to get the lighting as even as possible. This helps ensure that the green coloring is even, with no hot spots or shadows, which will help with the chroma key process in post-production. You will also need to light your actors and the green screen separately, preferably with the actors and the green screen background at least six feet apart. Remember to match the lighting on your actor to the scene in which they’ll appear once the green screen is composited.
In this article on green screen lighting, you’ll find the key to even lighting is the same for achieving soft light in any other shooting scenario — use big, soft light sources. Hard light sources with no diffusion will create hot spots on the green screen background. To diffuse your lights, you can use on-light diffusion boxes or set up large silk frames. If you are on a budget, try using a white bed sheet mounted on a c-stand a few feet in front of your light.
The placement of your lights also matters. If you are only using two lights to illuminate your background, place one light on each side of the green screen, a few feet back on a 45 degree angle. You can fine tune/adjust the angle of each light to make sure they’re not overlapping too much in the center. Make sure you are using the same lights on each side of the green screen for consistency. On bigger productions, you may need to use overhead lighting, additional lights, or more diffusion, but the basic principles outlined here will be the same.
Step 3: Getting a Clean Chroma Key

Image via Warner Bros.
As mentioned, chroma key refers to the technique of compositing two images (or video clips) together based on color hues. And in our case, we are using a green screen to replace what is behind our actors. You will often hear the term “clean chroma key” when editors are referring to green screen composting. A clean chroma key composite is the end goal.
Preventing Spill
A clean chroma key will leave the actors or subject with crisp, defined edges that look natural. But oftentimes, digital artifacts, jittery/jagged edges and color spill from the green screen can appear. Spill is one of the biggest offenders – it happens when the green screen reflects back on your subject, creating a green halo that’s hard to get rid of in post.
This article on clean chroma keying has some great tips and tricks that will help your chroma key results, including how to prevent spill with thoughtful planning. One of the first is deciding if you should use a green screen or blue screen. On today’s digital cameras, green will likely give you the cleanest key. However, if your actor has blonde hair or green clothing, you’ll likely have better results with a blue screen as green can spill into light-colored hair.
Using Motion Blur
The whole point of the green screen process is to achieve sharp edges, and motion blur can undo this. For that reason, it’s best to film green screen shots with a fast shutter speed to eliminate motion blur. This may almost appear as a stuttering movement on the actors. You can fix this by adding motion blur back onto your actors in post-production. You can use CC Force Motion Blur in After Effects or try the third-party plugin ReelSmart Motion Blur. Adding motion blur back on your composite will make a noticeable difference.
Film with a Low ISO
You also want to make sure you film your green screen scene with a low ISO setting – we recommend the lowest ISO setting your camera has available. This is because higher ISO levels introduce noise artifacts and those will appear on the green screen background. This can result in a lot of “off-color” spots on the green screen background that can make the keying process more difficult.
How to Key a Green Screen Scene
If you have followed the green screen workflow recommendations so far, keying your footage will be much easier. Always fix any issues on set if you notice them, because the old adage “fix it in post” won’t work well with green screen footage. It really is a multifaceted process that requires a coordinated workflow.
Keying with Your NLE of Choice

Image via Rubidium Wu, Working with a Green Screen Is Easier than Ever — Here’s Why
Nowadays you have a lot of options when it comes to the chroma key software you can use for keying your green screen footage. Keying effects aren’t just limited to composing software anymore. Nearly every traditional non-linear editor has a chroma keyer built into it. There are even some great free software options available, such as HitFilm Express and DaVinci Resolve.
Keying in DaVinci Resolve
DaVinci Resolve is a free video editor that is regarded as one of the best color grading applications available. It also has some great chroma key tools as well. In this article learn how to pull a clean key in DaVinci Resolve from start to finish. Resolve’s effects are applied using a node-based workflow, which may take some time to get used to if you haven’t used one before. However, this node-based system will ultimately give you the most options when it comes to customizing your footage with various keying effects.
Keying in After Effects
Adobe After Effects is another popular option (and this author’s chroma key software of choice). Because After Effects is a dedicated compositing program, you can imagine there are lots of effects you can use to refine your chroma key. The free built-in keyer effect called Keylight is quite powerful and was developed by The Foundry, the same company that makes Nuke, a powerful professional compositing application. Check out this tutorial to learn more about keying footage in After Effects.
Keying in Premiere Pro
Even though Premiere Pro is first and foremost a non-linear editor, it has most of the powerful keying effects from After Effects built in it as well. In this in-depth article, Brent Pierce shows the entire chroma key process for Premiere Pro. The keying effects in Premiere Pro are fantastic if you need a quick turn-around on a project. They’ll save you from having to round-trip into After Effects, which will also save on render time/file management. The only drawback in Premiere Pro would be if you have to do a lot of manual masking. For that type of work, you will be much better off in After Effects.
Keying in Final Cut Pro X
Final Cut Pro X has a more causal workflow when it comes to dealing with green screen footage. This can be useful for amateur video users or YouTubers who just need a quick solution. Add your green screen footage to your timeline, then apply the Keyer effect to the footage. It will automatically key out the green screen with varied results. You can continue to refine the look with some simple controls under the Video options when your clip is selected. Check out this tutorial for a simple walk through. Shutterstock also has some step-by-step instructions for keying your footage in Final Cut Pro X.
Keying in HitFilm Express
HitFilm Express is another free option and is comparable to After Effects, with a more compositing-focused workflow. You can key out your footage using two different effects, the Color Difference Key effect and the Hue & RGB Key effect. Check out this tutorial to see the chroma keyer workflow in HitFilm Express. Conversely, if you need an even more powerful keying option, they have a paid Chroma Keyer effect as well. (The Chroma Keyer effect is included in the paid version of HitFilm, but must be purchased separately if you are using the free HitFilm Express.)
How to Fix Bad Green Screen Footage
If you are working with a less than ideal green screen setup, there are still methods you can take to help remedy the final footage. While there are some post-production options for fixing green screen mistakes, it’s always better to catch them on set.
If your green screen background has problems…
If your green screen background is less than ideal – for example, if the green screen has wrinkles on it – you can film with a shallow depth of field to help blur out the background. This will help smooth out wrinkles and potential shadows/hot spots, which will make the post-production keying easier.
If there’s too much spill…
Use masking as much as possible. As mentioned before, if your subject is wearing green clothing or reflective jewelry, you’ll probably want to manually create a mask around that area and key frame it. Then overlay that back on top of your footage, so it doesn’t get removed by accident during the keying process. I also recommend roughly masking out your actor prior to the key as well. Just make sure they don’t move outside of the masked area at any point. You can always set key frames for the mask and move it around if they do.
Green screen spill can be tricky to get rid of. It often requires finding the perfect chroma key balance for the background and your subject, and then desaturating any green color remnants left on your subject.
In this article from RocketStock, you can learn how easy it is to fine tune spill suppression with After Effects’ built-in tools. Getting this perfect will drastically help sell the final look of your chroma key.