
Review: Avid Media Composer Symphony 2018 v.12
By Adam Noyes
In February of 2018, we saw a seismic shift in the leadership at Avid. Chief executive officer Louis Hernandez Jr. was removed and subsequently replaced by Jeff Rosica. Once Rosica was installed, people who worried Avid was about to be liquidated to the highest bidder breathed a sigh of temporary relief. We wanted to see where the new action plan from Avid, specifically on where Media Composer and Symphony were going.
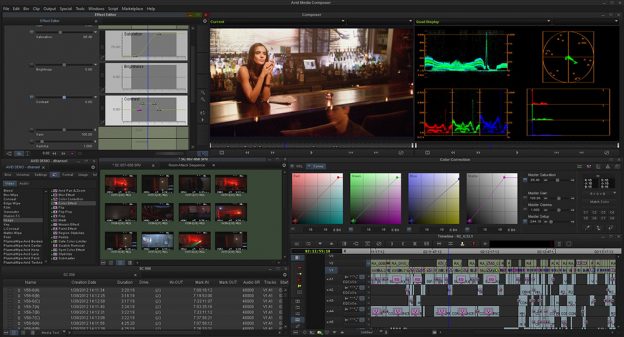
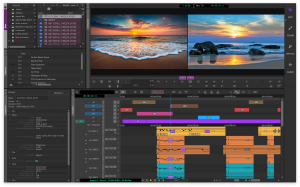
Media Composer with Symphony
We read how Avid was taking lessons from its past transgressions and listening to its clients. Avid was taking tours around the industry and listening to what customers and artists needed from them. So was Media Composer with Symphony ever be the finishing tool of Avid DS was? It’s starting to look that way.
It appears from the outside that Rosica is indeed the breath of fresh air Avid needed. At NAB 2019, Avid teased the next iteration of Media Composer, version 2019, with overhauled interface and improvements, such as a 32-bit float color pipeline workflow complete with ACES color management and a way to deliver IMF packages; a new engine with a distributed processing engine; and a whole new product called Media Composer|Enterprise, all of which will really help sell this new Media Composer. But the 2019 update is coming soon we looked at Media Composer 2018 v12, which has many features editors, assistants, and even colorists have been asking for: a new Avid Titler, shape-based color correction (with Symphony option), new multicam features and more.
Titling
Titling is always a tricky subject. Avid has gone through some rough seas when dealing with how to fix the leaky hole known as the Avid Title Tool. The classic Avid Title Tool was basic but worked. However, if you aligned something in the Title Tool interface to Title Safe zones, it might jump around once you close the Title Tool interface. Fonts wouldn’t always stay the same when working across PC and MacOS platforms. The list goes on, and it is excruciatingly annoying.
In 2002, Avid tried to appease creators and introduced the, at the time, a Windows-only titler: Avid Marquee. While Marquee was well-intentioned, it was extremely difficult to understand if you weren’t interested in 3D lighting, alignment and all sorts of motion graphics stuff that not all editors want to spend time learning. So, most people didn’t use it, and if they did it took a little while for anyone taking over the project to figure out what was done.
In December of 2014, Avid leaned on the New Blue Titler, which would work in projects higher than 1920×1080 resolution. Unfortunately, many editors ran into a very long render at the end, and a lot bailed on it. Most decided to go out of house and create titles in Adobe Photoshop and Adobe After Effects. While this all relates to my experience, I assume others feel the same.
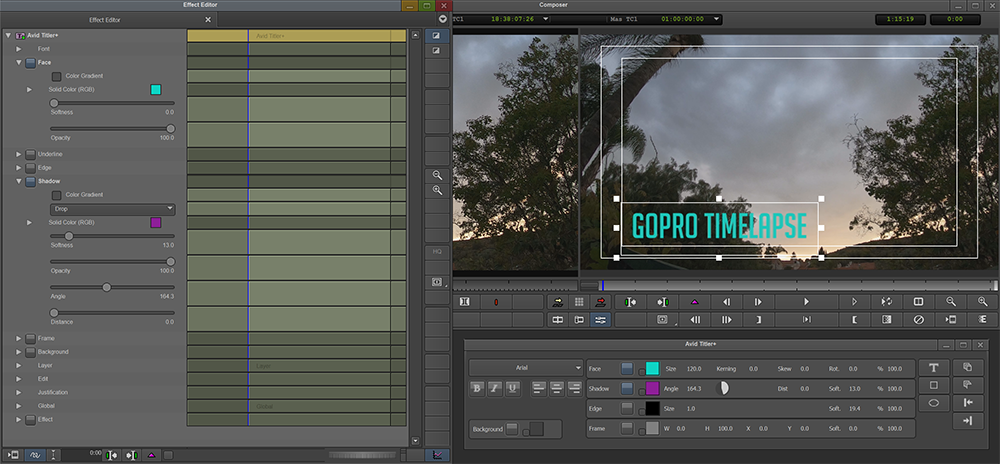
In Avid Media Composer 2018, the company has introduced the Avid Titler, which in the Tools menu is labeled: Avid Titler +. It works like an effect rather than a rendered piece of media like in the traditional Avid Title Tool, where an Alpha and a Fill layer worked. This method is similar to how NewBlue or Marquee functioned. However, Avid Titler works by typing directly on the record monitor; adding a title is as easy as marking an in and out point and clicking on the T+ button on the timeline.
You can specify things like kerning, shadow, outlines, underlines, boxes, backgrounds and more. Under Face, the rotation settings rotate individual letters and not the entire word by default. Avid said they are looking into making the entire word rotation option the default in the mini toolbar of Avid Titler. So stay tuned.
Also, you can map your fast forward and rewind buttons to “Go To Next/Previous Event.” This allows you to jump to your next edits in the timeline but also to the next/previous keyframes when in the Effect Editor. Typically, you click on the scrub line in the record window and then you can use those shortcuts to jump to the next keyframe. In the Avid Titler, it would just start typing in the text box. Furthermore, when jumping out of Effect Editor mode and back into Edit Mode, you usually hit “y,” but that did not get me out of Effects Mode (Avid did mention they are working on updates to the Avid Titler that would solve this issue). The new Avid Titler definitely has some bugs and/or improvements that are needed, and they are being addressed, but it’s a decent start toward a modern title editor.
Color
Shape-based color correction
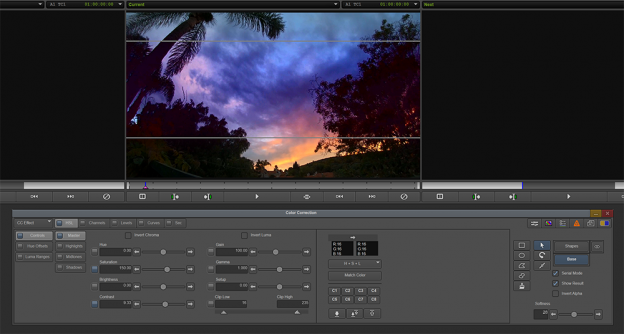
If you want advanced color correction built into Media Composer, then you are going to want the Symphony option. Media Composer with the Symphony option allows for more detailed color correction using secondary color corrections as well as some of the newer updates, including shape-based color correction. Before Resolve and Baselight became more affordable, Symphony was the gold standard for color correction on a budget (and even not on a budget since it works so well in the same timeline the editors use). But what we are really here for is the 2018 v.12 update of Shapes.
With the Symphony option, you can now draw specific regions on the footage for your color correction to affect. It essentially works similarly to a layer-based system like Adobe Photoshop. You can draw shapes with the same familiar tools you are used to drawing with in the Paint or AniMatte tools and then just apply your brightness, saturation or hue swings in those areas only. On the color correction page you can access all of these tools on the right-hand side, including the softening, alpha view, serial mode and more.
When using the new shape-based tools you must point the drop-down menu to “CC Effect.” From there you can add a bunch of shapes on top of each other and they will play in realtime. If you want to lay a base correction down, you can specify it in the shape-based sidebar, then click shape and you can dial in the specific areas to your or your client’s taste. You can check off the “Serial Mode” box to have all corrections interact with one another or uncheck the box to allow for each color correction to be a little more isolated — a really great option to keep in mind when correcting. Unfortunately, tracking a shape can only be done in the Effect Editor, so you need to kind of jump out of color correction mode, track, and then go back. It’s not the end of the world, but it would be infinitely better if you could track efficiently inside of the color correction window. Avid could even take it further by allowing planar tracking by an app like Mocha Pro.
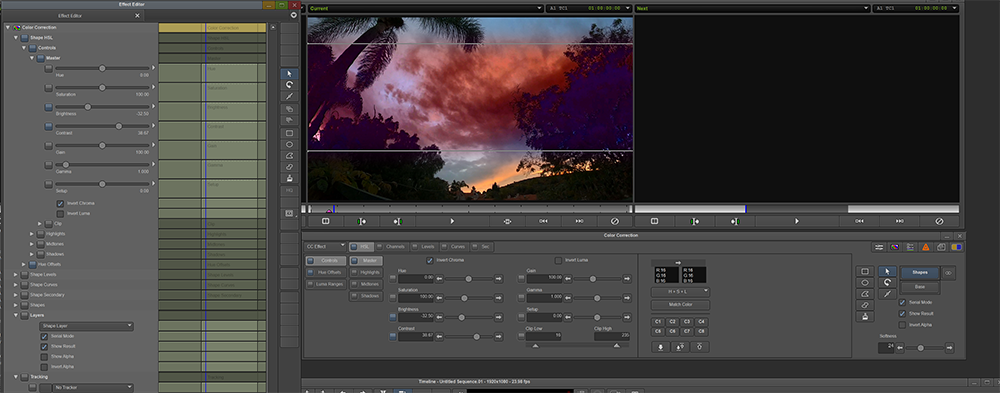
The new shape-based corrector also has an alpha view mode identified by the infinity symbol. People often find myself making mattes in the Paint tool, but it can now be done right in the color correction tool. The Symphony option is an amazing addition to Media Composer if you need to go further than simple color correction but not dive into a full color correction app like Baselight or Resolve. In fact, for many projects you won’t need much more than what Symphony can do. Maybe a +10 on the contrast, +5 on the brightness and +120 on the saturation and BAM a finished masterpiece. Kind of kidding, but wait until you see it work.
Multicam
The final update to cover is multicam editing and improvements to editing group clips. Literally days of grouping and regrouping could have been avoided with the Edit Group feature. You can now edit groups in Media Composer by creating a group, right-clicking on that group and selecting Edit Group. From there, the group will now open in the Record Monitor as a sequence, and from there you can move, nudge and even add cameras to a previously created group. Once you are finished, you can update the group and refresh any sequences that used that group to update if you wish. One issue is that with mixed frame rate groups, Avid says committing to that sequence might produce undesirable effects.
Cost Entry
How much does Media Composer cost these days? While you can still buy it outright, it seems a bit more practical to go monthly since you will automatically get updates, but it can still be a little tricky. Do you need PhraseFind and/or ScriptSync? Do you need the Symphony option? Do you need to access shared storage? There are multiple options depending on your needs. If you want everything, then Media Composer Ultimate for $49 per month is what you want. If you want Media Composer and just one add-on, like Symphony, it will cost $19 per month plus $199 per year for the Symphony option. If you want to test the water before jumping in, you can always try Media Composer First.

Summing Up
In the end, it is the most reliable nonlinear editor supporting multiple editors in a shared network environment. While Adobe Premiere Pro, Apple Final Cut Pro X and Blackmagic Resolve are offering fancy new features and collaboration modes, Avid seems to always hold stable. These new improvements and a UI overhaul (set to debut in May), new leadership from Rosica, and the confidence of Rosica’s faithful employees all seem to be paying off and getting Avid back on the track they should have always been on.